Users
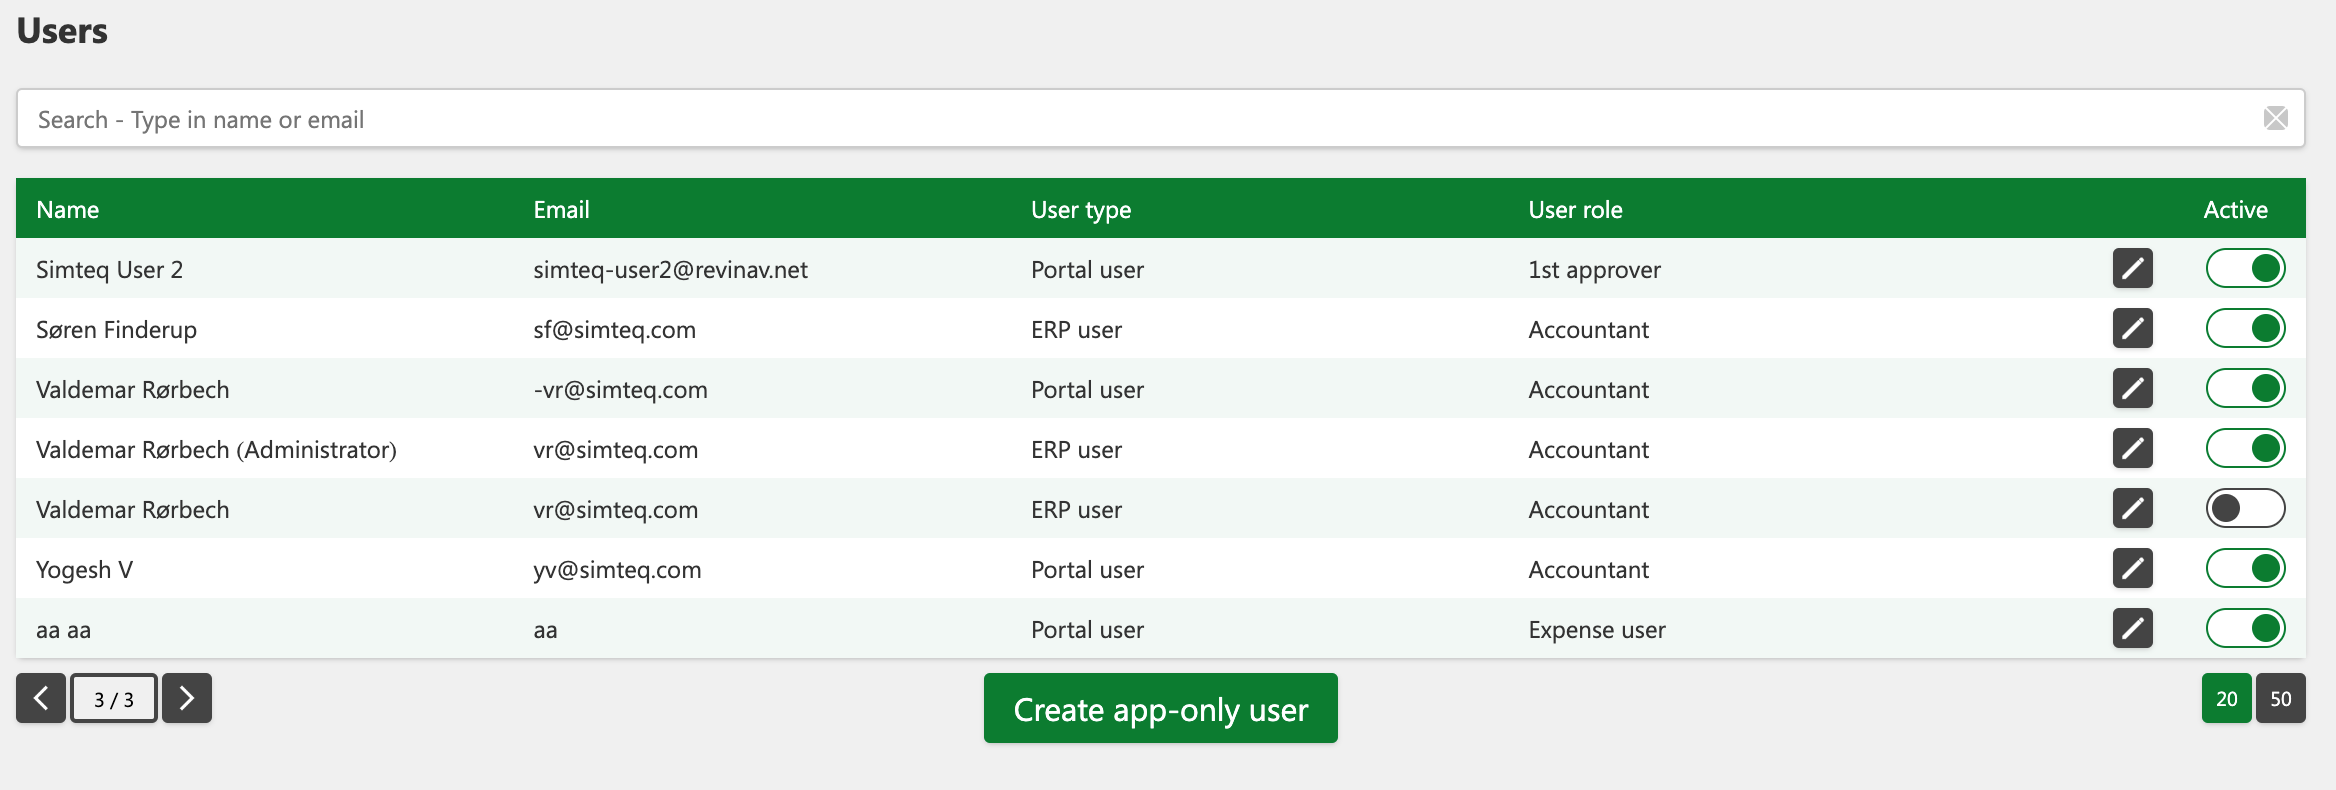
The user list provides an overview of all users created in 2Click Accounting. It is important to note that a user can be created without necessarily being active. The list contains the following information about each user:
-
Name
-
Email
-
User type
-
User role
-
The "Active/Unactive" button for the profile
Note: A user must be active to be able to log in to 2Click Accounting.
Search field
There is a search field where you can enter one of the following parameters to find specific users:
-
Name
-
Email
There is a small X in the search field that you can use to clear the search input.
Creating Users
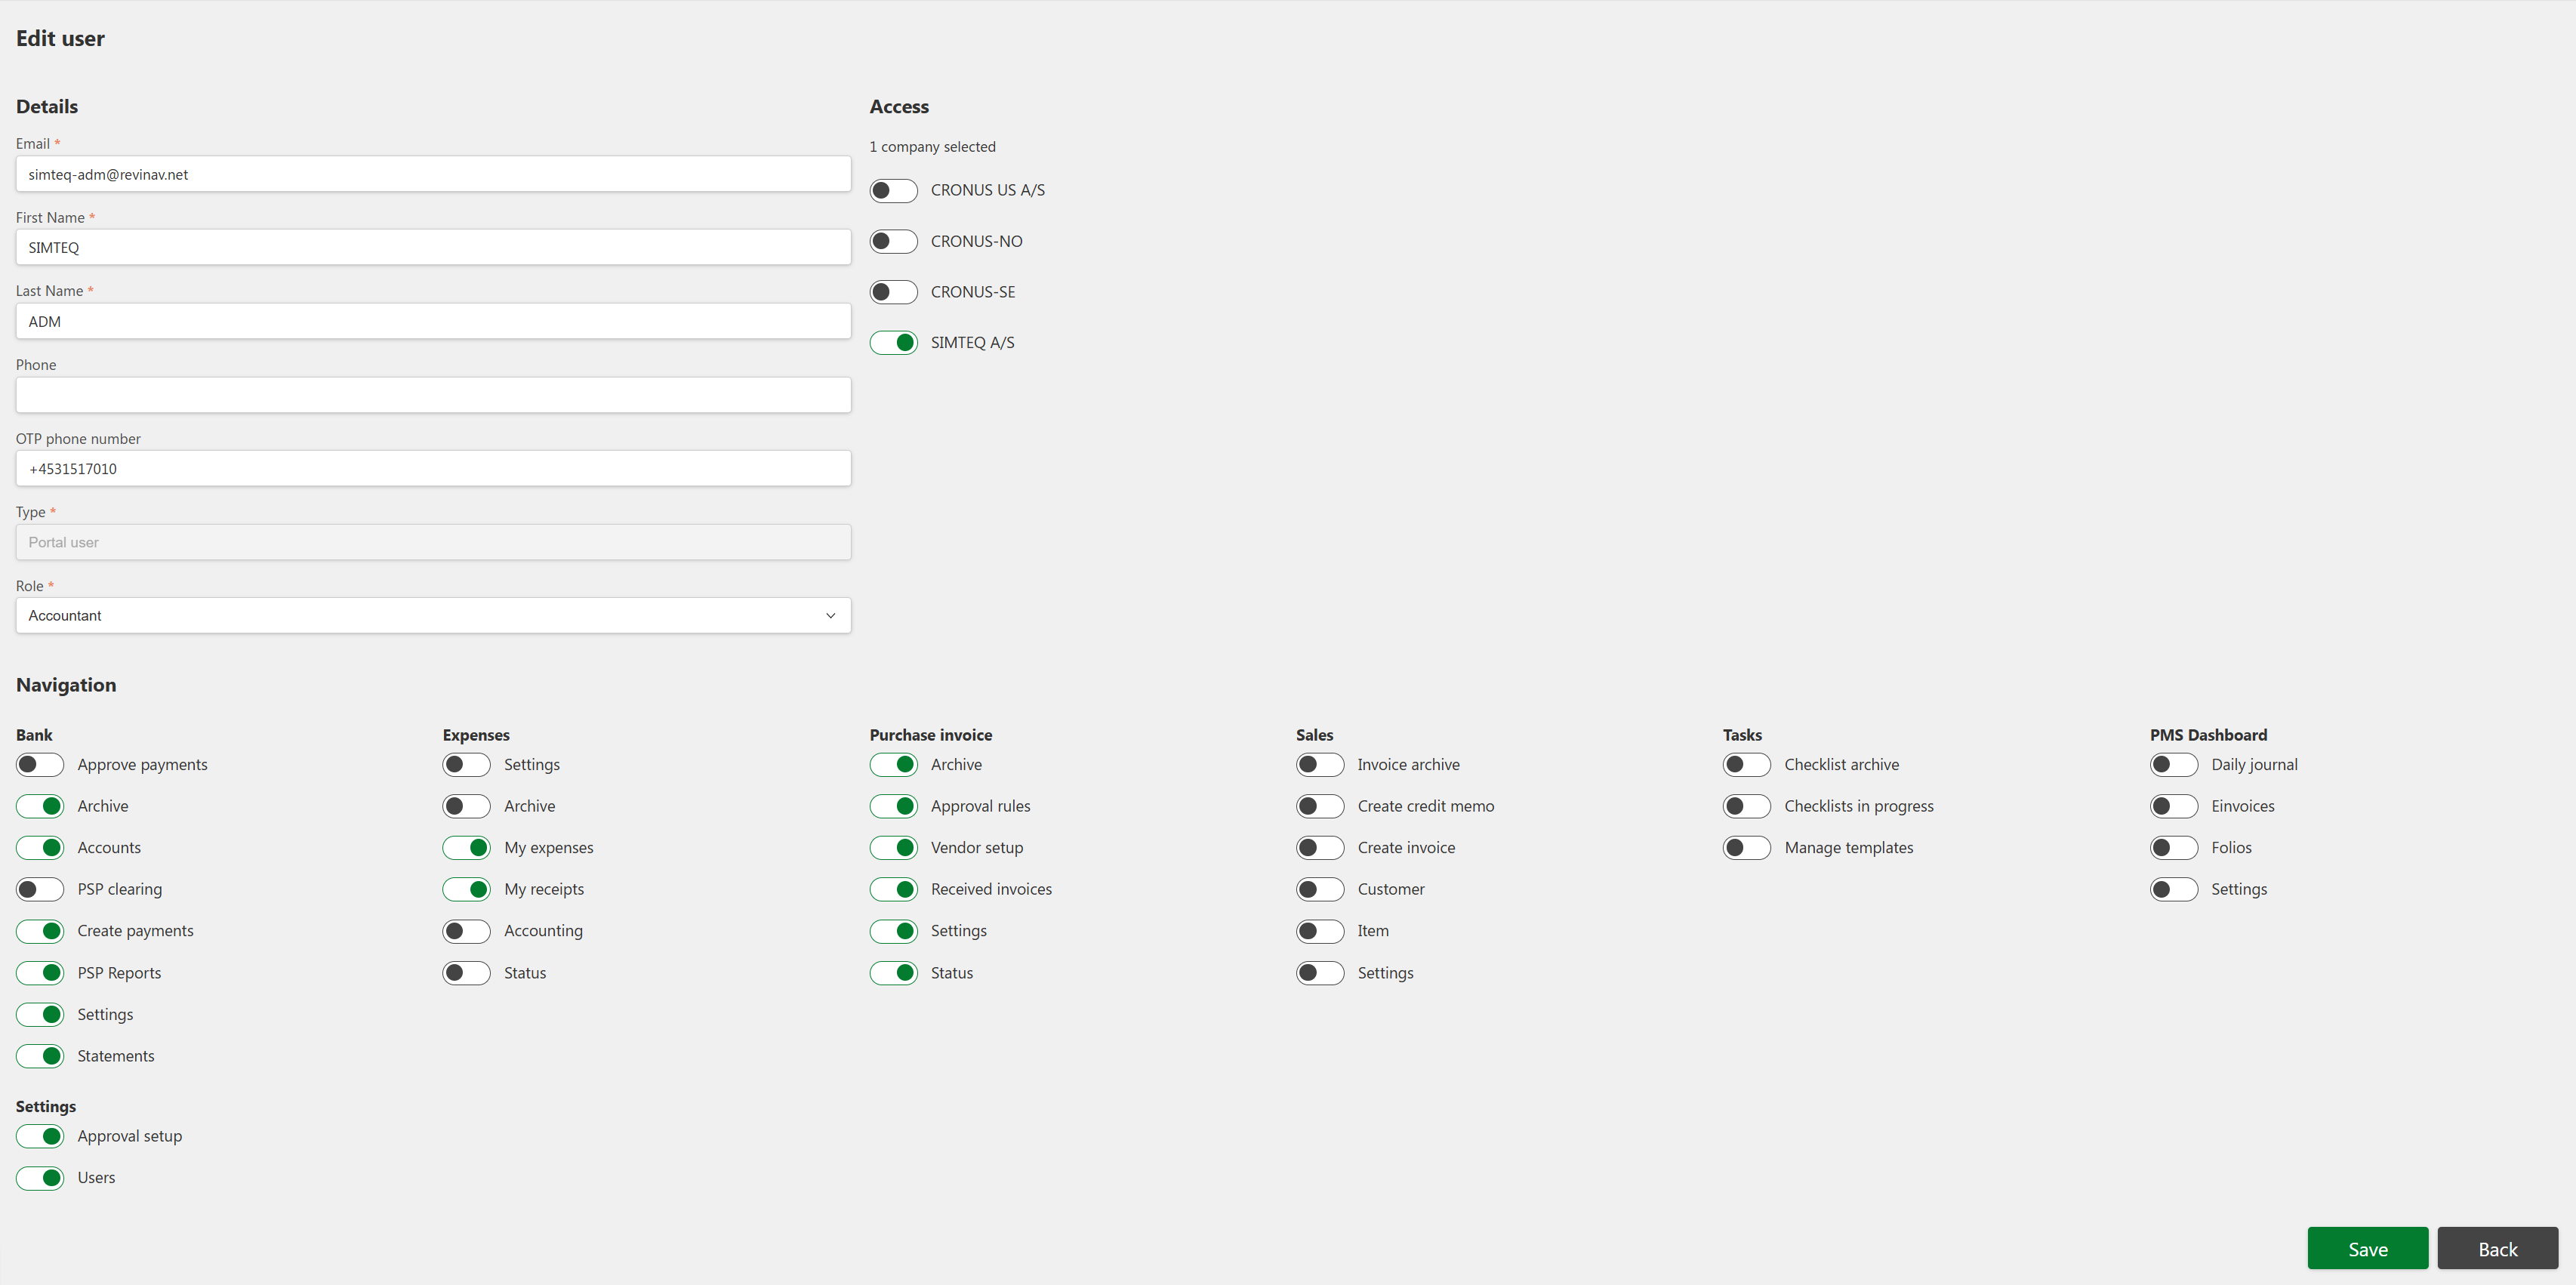
As an administrator (or super user) in your company, you have the option to create users for the company's profile in 2Click Accounting, which means that you can avoid contacting support for this purpose. To create a user, you need the following information:
-
Email
-
First name
-
Surname
-
Country code - OTP phone number
-
OTP phone number (User's mobile number)
Note: In order for the user to be able to create payments in Bank, the OTP fields must be filled in. If not, it is not necessary to provide this information.
As of the May 2026 release, administrators (only) can now edit a user's account email and OTP phone number - fields that previously could not be changed after a user was created.

What is OTP and why is it necessary to provide a phone number?OTP (One-Time Password) is a system that is used every time a user creates a payment in Bank. The OTP acts as a security measure to confirm the creation of payments. The user will receive a code via SMS to the provided phone number, which must then be entered to complete the payment. This ensures that the payment is authorized and protects against unauthorized access.
How to create a user
-
Click Settings from the menu, and then select Users.
-
Click the + (Add) button.
-
Fill in the required fields with the user's information.
-
Click Active to activate the user.
-
Under the Access section, click your company to give the user access.
-
At the bottom of the page, you will see the Navigation section. Enable the functions that the user should have access to in 2Click Accounting.
-
Click Save to save the creation of the user.
If you regret creating the user, you can click Back to cancel the process.
User roles and access
Each user can be created with specific access and permissions depending on their responsibilities. For example, some employees may only need to submit and approve expenses - in this case, the role Expense user can be selected in the Role dropdown.
Users who require broader access, such as handling invoices, payments, and accounting tasks, should instead be assigned the Accountant role.
In addition to the selected role, you can fine-tune each user’s permissions by enabling or disabling access to individual modules and tabs within the system. This allows you to tailor the platform precisely to your company’s internal workflows, ensuring that every user only sees and works with the functions relevant to their role.
Note that as of the October 2025 release, accountants can now access selected bank settings - excluding general bank settings - even if they are not registered as administrators in the company’s system. This update ensures greater flexibility and efficiency, allowing users with accountant roles to manage essential banking configurations without requiring full administrative privileges.
As of the May 2026 release, administrators can grant non-admin users access to Users and Approval setup under the Navigation → Settings section, effectively turning them into super users - a level between a normal user and an admin. This allows them to create users and configure approval groups, flows, and rules without requiring full administrator privileges.
How to edit a user
-
Click Settings from the menu, and then select Users.
-
Find the user you want to edit.
-
Click the Edit button.
-
Make the necessary changes in the desired fields.
-
Click Save to update the user's information.
If you regret the edit, you can click "Cancel" to cancel the changes.
You also have the option to edit the user's access to sections or change whether the user is active or disabled.
Button overview

Edit button: Used to edit information for an existing user.

+(add) button: Used to create a new user in the system.

Unactive/Disabled: Indicates that the feature or user is disabled.

Active/Enabled: Indicates that the feature or user is active.