Received invoices
Purchase invoice → Received invoices handles every invoice your vendors send to your OCR email. Invoices are read automatically by OCR, which extracts and structures the data, and AI analysis now reads all words and values on the invoice, which means fewer manual corrections.
How invoices arrive
Your OCR email. Once you are registered and connected to the ERP, a unique email address is generated for your company. It appears at the bottom of the navigation menu.
Share it with your vendors so they send invoices directly. Where the automatic extraction gets something wrong, you can correct it with the gear button — see OCR template.
By upload. Choose Upload invoice. The file must be a PDF or an e-invoice XML, and at most 25 MB.
As an e-invoice. Documents received electronically arrive without needing to be read.
Finding an invoice
The search field accepts vendor name, invoice number and document number; the small x clears it.
Filters are available across Received invoices, Approval, Archive and Status:
- Document date — the date on the invoice
- Received date — when it arrived in the system
- Due date
- Awaiting approval by — the user it currently sits with
- Department
- Employee
Enter a keyword or choose filter values, then click Select to apply. The ✕ in the search field clears everything.
Sort by clicking Vendor, Invoice no or Received date. Clicking again reverses the direction, and a small arrow shows which way it is sorted.
The table
The table shows 20 invoices per page by default, and you can switch to 50. The most recent is at the top. The default sort can be changed under View options in Settings.
Colour tells you the status at a glance:
- Blue — AI has found a related purchase order or receipt to match the invoice against. See Settings for matching.
- Orange — an approver rejected it. Hover the line to read the reason, which is also in the activity log.
The layout
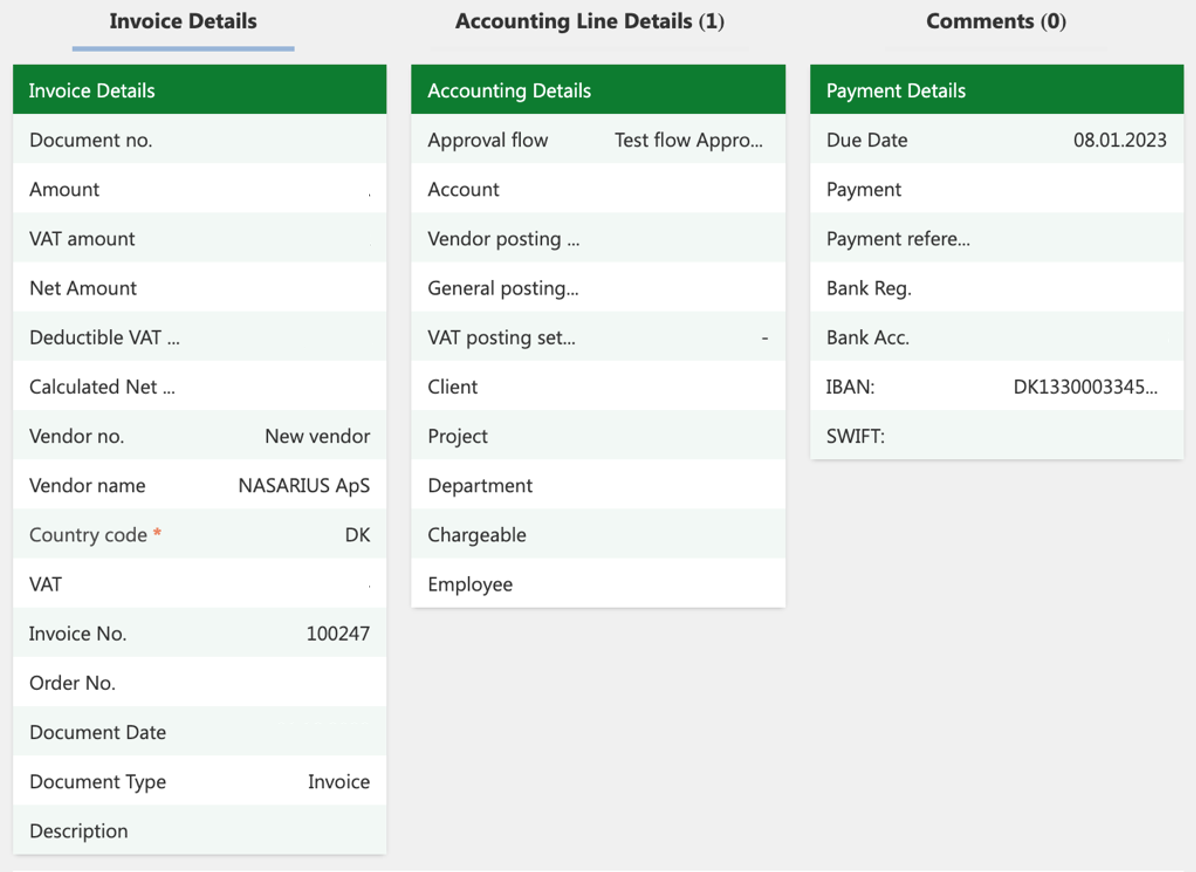
The invoice shown is fictitious, for documentation purposes only.
Left: the table of invoices, with vendor, invoice number and received date.
Right: the selected invoice, split into Invoice details, Accounting information and Payment information, plus Accounting line details for the lines.
Bottom: the invoice itself as a PDF. Navigation buttons page through a multi-page invoice, and Download saves it to your device.
Invoice details
The header-level information. Which fields appear depends on what the administrator has enabled.
Invoice details — vendor, invoice number, invoice date, and the matching type, which decides whether accounting lines are filled from a receipt or an order in the ERP.
Where your user reaches several companies, the Company field moves the invoice to another entity; it is transferred there once handled.
Accounting information — the approval flow and its steps, the accounts used, and dimensions where enabled.
Payment information — due date and payment status.
The vendor must exist
Where Fixed vendors is on for the company, the vendor has to exist in the ERP beforehand. You can assign an existing vendor, but not create one while coding.
Accounting lines
Reload vendor fetches the vendor's details again from the ERP.
Applying the same coding to every line

This button opens a window where you set coding once and apply it to every accounting line on the invoice, rather than editing each in turn. You can set the account type (G/L, item, item charge), account, description, general posting setup, VAT posting setup, dimensions, and the deferral schedule.
Some of these come from your ERP setup or have to be enabled first, in Settings.
Adding a line
You cannot add a line while editing one — save or undo first.
- Select the invoice.
- Open Accounting line details.
- Click Add, fill in the fields, and Save. Cancel undoes it.
Aggregated view
Where aggregated posting is on, you can switch between the Normal and Aggregated views. The aggregated view is read-only, and is unavailable when there are item account lines.
Comments
The Comments tab holds the activity on an invoice and lets you add your own, with a supporting document attached if needed. Activity appears here when an invoice is posted or sent for approval, and carries through to approved invoices, the archive and status.
To add one: select the invoice, open the Comment tab, click Add, optionally attach a document, write the comment and Confirm.
Posting
When the details and the accounting lines are right, use the green Post button. If something is missing, or posting fails, you are told why.
Minimum required to post:
- Amount without difference
- Currency code
- Country code
- Vendor number and vendor name
- Vendor posting setup
- Account
- Approval flow (where one is set up)
- Due date
- Payment type and its fields
To post: select the invoice → OCR button → select or crop the correct values into the fields → Confirm → Edit and complete the minimum fields → check the accounting lines → Post.
Deleting an invoice
Use the red X at the top right — for an invoice submitted in error, a duplicate, or one no longer relevant, such as a cancelled order.
You must enter a comment and confirm before the deletion completes.
A deleted invoice is still archived
It remains in the Archive, so the vendor can send it to your OCR email again, or you can resend it yourself.