Create credit memo
General structure
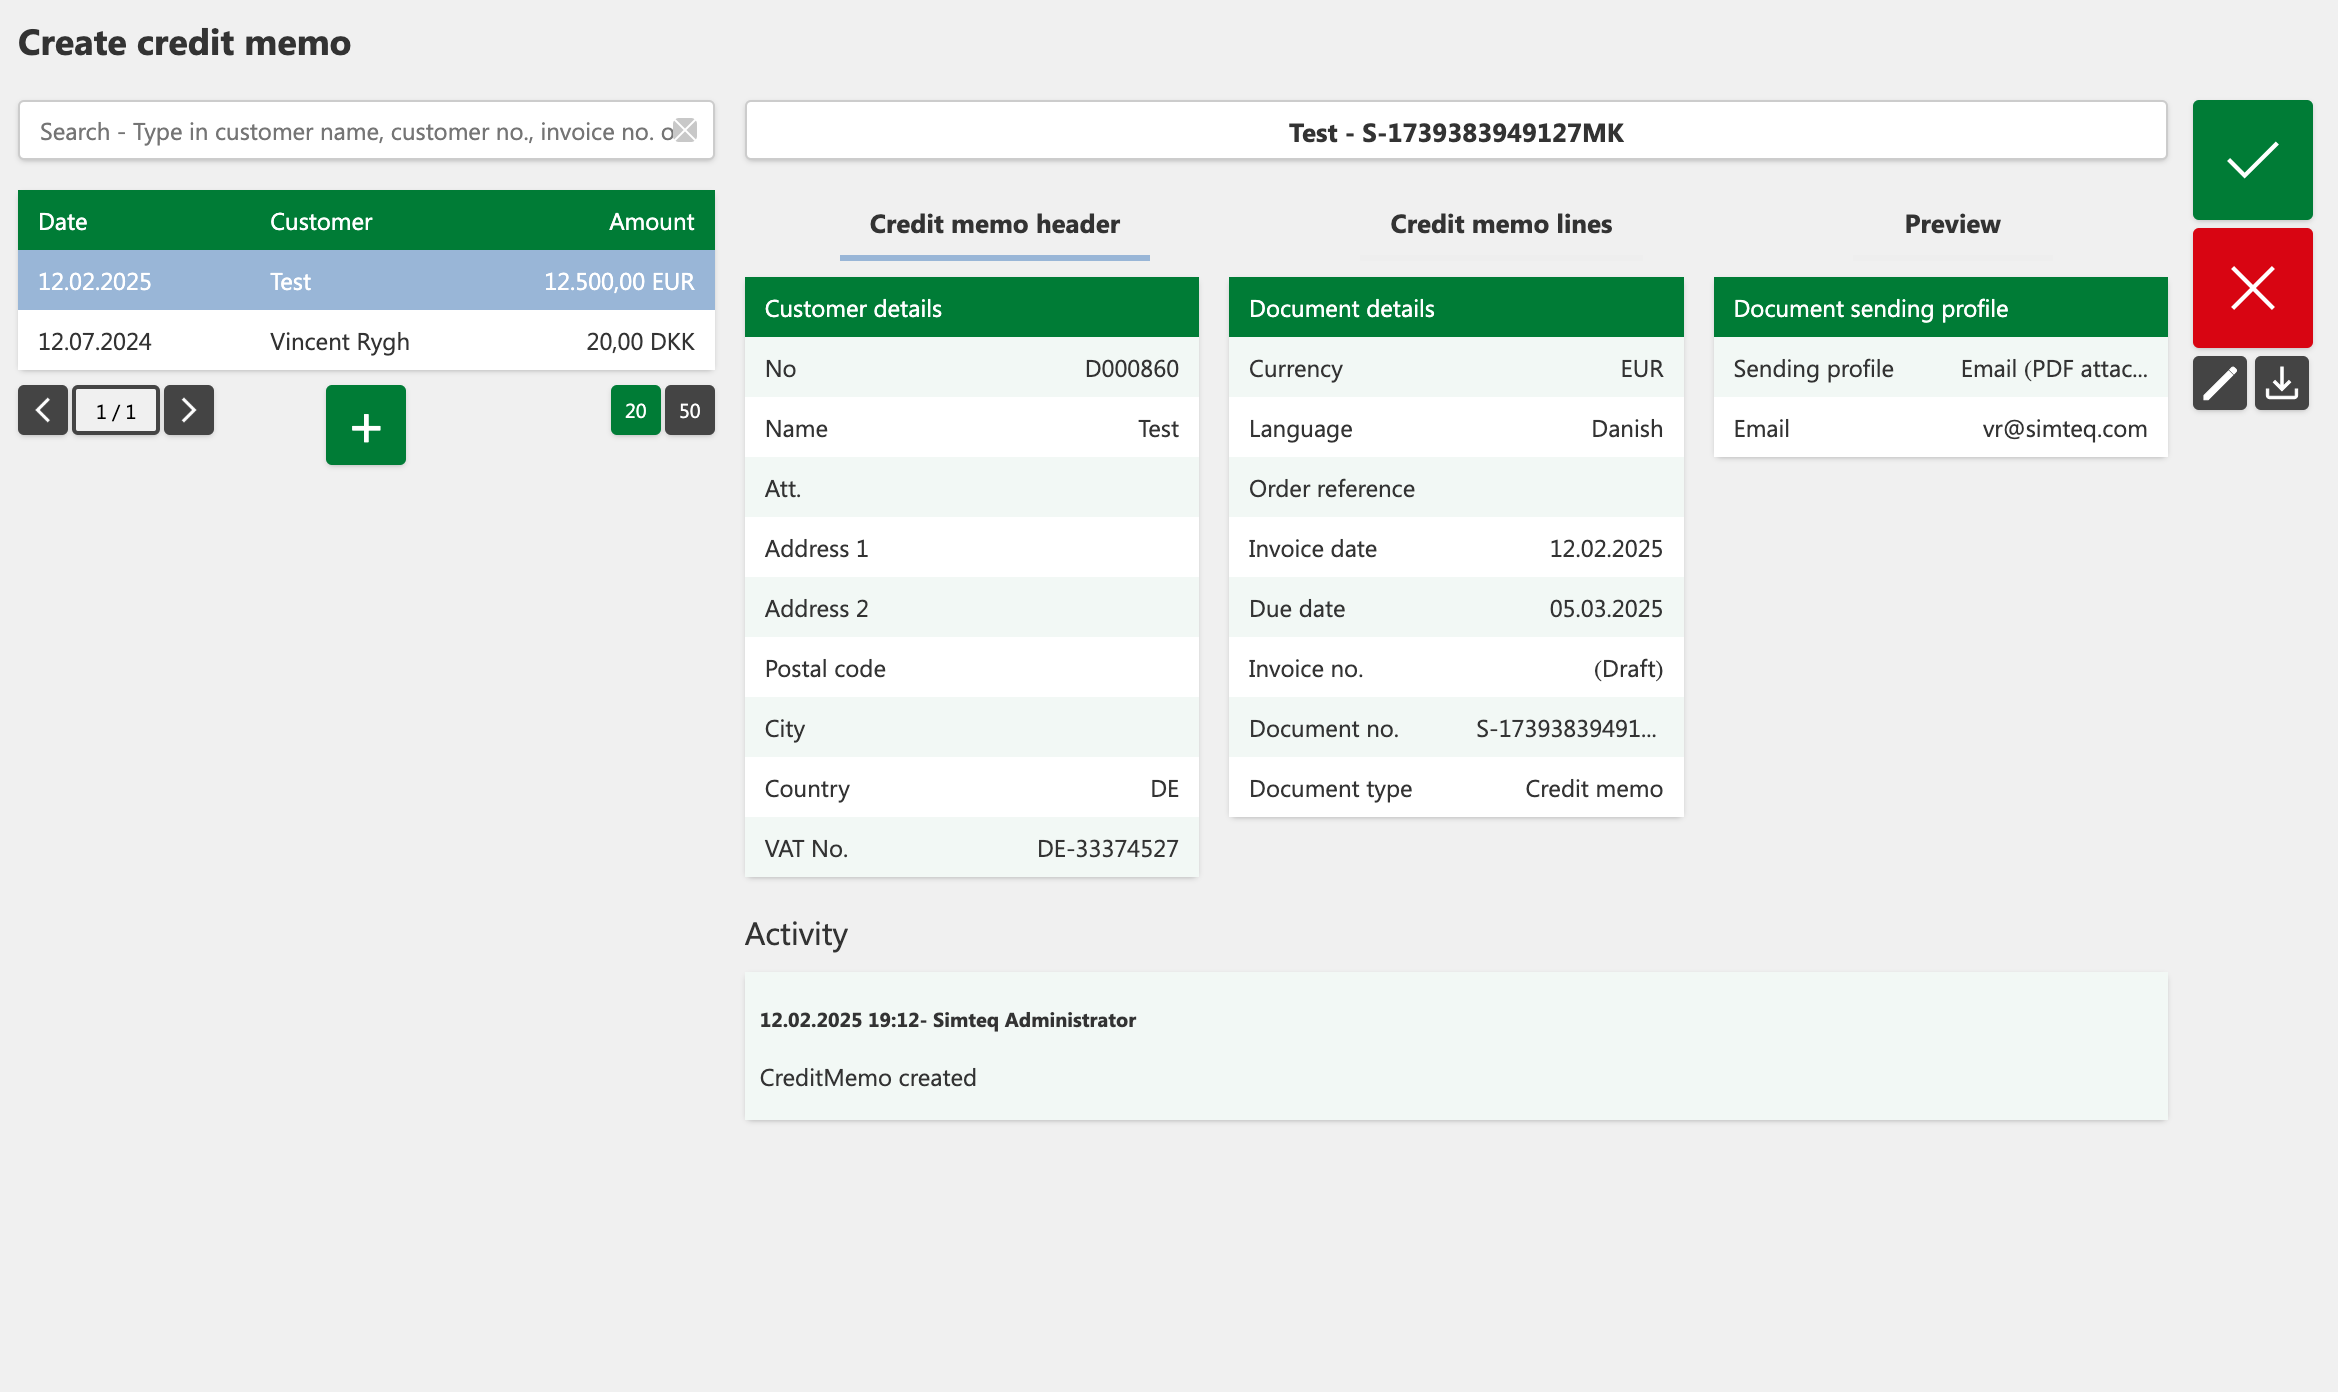
You have full flexibility to customize your credit memos exactly as you wish. We will guide you step by step through the process. Under the "Create Credit memo"-tab you get access to all your ongoing credit memos. These remain as drafts until they are posted and therefore do not affect your revenue.
The general structure of sales credit memos is divided into three main sections:
-
Table Summary of Created Credit memos
-
The credit memo details

Table Summary of Created Credit memos
This section gives you an overview of all credit memos that are pending posting. Features include:
-
A table that shows all created credit memos that have not yet been posted.
-
A search box to quickly find specific credit memos.
-
Navigation buttons and an add button to create new credit memos.
Credit memo details
The credit memo details consist of three tabs that contain important details:
-
Credit memo header: Contains information such as customer details, document details, shipping profile, and credit memo history.
-
Credit memo lines: Shows all sales records, tax calculations, and the total credit memo total.
-
Preview: Shows a PDF view of the credit memo that gathers data from both Credit memo Header and Credit memo Lines.
Search field
In the credit memo overview, you have access to a search field that makes it easy to find one or more credit memos. You can search by entering the following parameters:
-
Customer number
-
Customer Name
-
Document number
The search box also includes a small X, which allows you to quickly clear the box and start a new search.

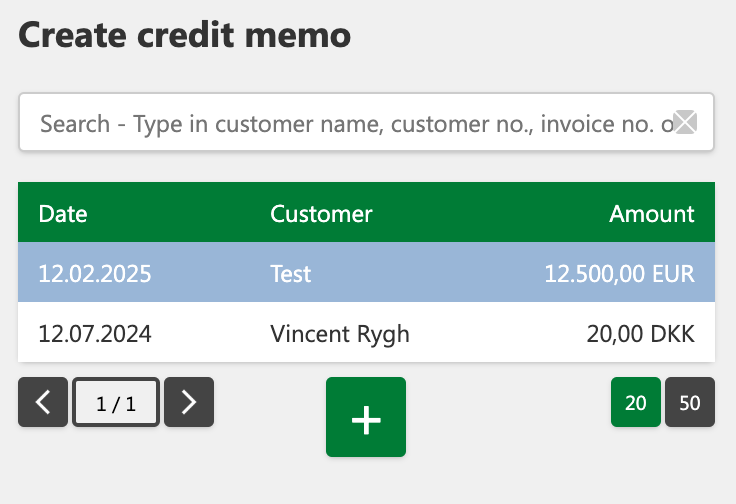
Table Overview**
The table overview provides a total view of all credit memos that are drafts and therefore not yet posted. When a credit memo is posted, it is automatically moved to the "Archive" section, where it is kept as a completed transaction
Table contents
The table is designed to be clear and contains the following key information:
-
Credit memo date (date of creation)
-
Customer Name
-
Amount
The credit memos are automatically sorted in descending order by credit memo date, ensuring that the most recent credit memos are always at the top. You can select a specific credit memo by clicking on it, and it will be marked with a highlighted background color for easy identification.

Navigation buttons and view buttons
Below the table you will find a several navigation- and customization options:
-
Navigation buttons (left): Use these buttons to flip back and forth between the credit memos in the table.
-
"+" button (Add/Create Credit memo): Use this button to quickly create a new credit memo.
-
Item view (right): Here you can choose how many credit memos should be displayed in the table at once. The current view is marked with a green color for clarity.
These features give you full control over how you navigate and interact with the credit memo summary.
Add credit memo
Before you can create a credit memo, the customer must be registered in the submenu "Customers". This ensures that all necessary information is available for credit memo creation.
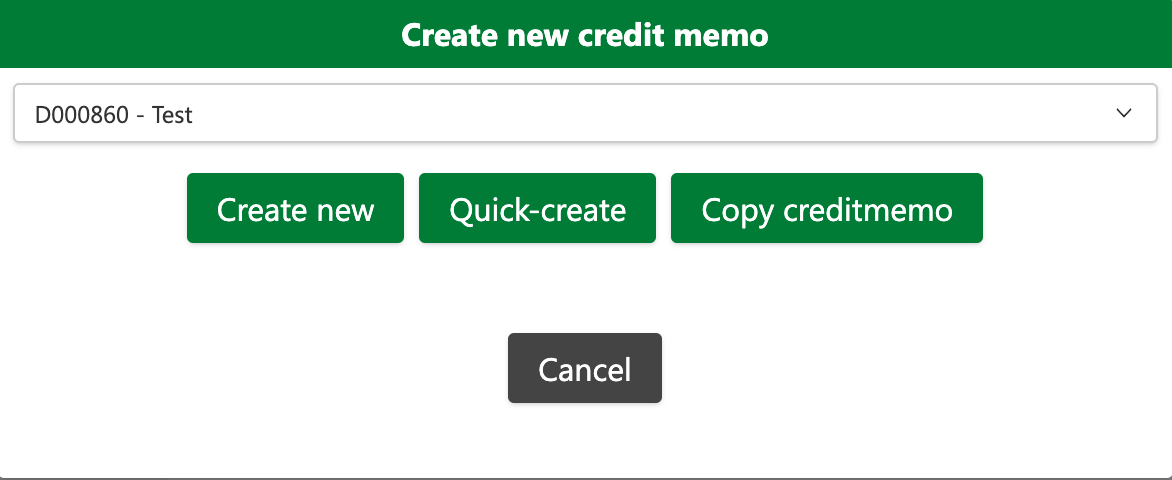
Once the customer is created, you have three options for creating a credit memo:
-
Create new: Create a brand new credit memo from scratch, where you manually fill in the necessary details.
-
Quick-Create: This method allows you to quickly create a credit memo and immediately add credit memo lines, making the process more efficient.
-
Copy credit memo: Create a new credit memo by copying an existing journal or a previously posted credit memo. This is especially useful if you need to create a recurring credit memo with the same details.

How to create a credit memo**
-
Navigate to Sales in the menu and select Create credit memo.
-
Click Add in the left table to create a new credit memo.
-
Select the customer to credit memo and click Create new.
-
Fill in or adjust the details in the credit memo header, including customer and document details.
-
Switch to the Credit memo lines tab, where you can add products or services. Click Add credit memo line for each item line you want to include.
-
When all line items have been created, click Save to save the credit memo as a draft.
-
When the credit memo is ready, you can post it and send it directly to the customer trough the system.
Note: You can always use the **Preview tab ** to review a PDF version of the credit memo before saving or sending it.
Credit memo header
The credit memo header consists of three smaller sections and provides a detailed overview of the credit memo's history:
- Customer Details
Contains data retrieved from the customer's setup under Customers, e.g. name, address and other relevant contact details.
- Document Details
Contains key information about the credit memo, such as currency, language, credit memo date, due date, and document number. This information is essential for the validity of the credit memo.
- Document Sending Profile
Shows how the credit memo is sent to the customer – either by email or through electronic invoicing. Electronic invoicing takes place via CVR number, GLN/EAN or P-number.
Mandatory fields for posting
The following fields must be filled in in the credit memo header in order to post a credit memo:
-
Customer number
-
Currency
-
Language
-
Credit memo date
-
Due date
What is EAN?
An EAN number is a 13-digit identification number used for electronic invoicing. All public authorities and institutions must be registered with an EAN number, but it can also be used by private companies. When your company has an EAN number, it can receive digital credit memos from other companies and public institutions.
Activity log (History)
At the bottom of the section is a history list that shows an activity log for the credit memo. The log contains the following information:
-
Date and time of the action
-
The responsible person behind the action
-
A description of the action that has been performed
Credit memo lines
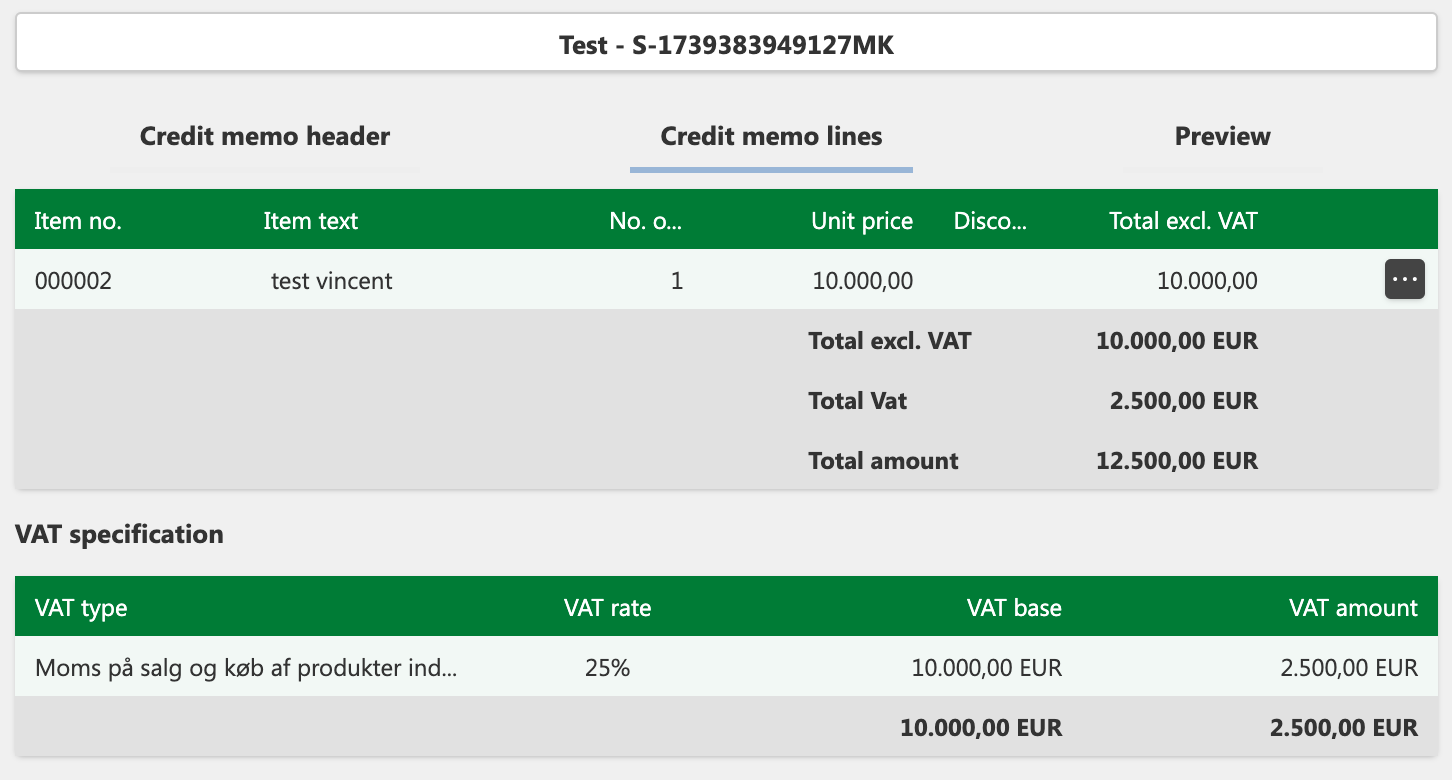
The credit memo lines display a table with detailed information about the items that are included in the credit memo, including quantity, unit price, total price excluding tax, and discount percentage. You must create a list of items that you can select from under the credit memo lines, which is recommended for items that you continuously sell. It is also possible to manually enter items in the credit memo lines if they are not in the list of items.
Each credit memo line includes a See more button that gives you access to the posting details for each sales entry. These details are retrieved from your item setup under "Item", where you have entered specific posting details once for efficiency. For further information, see the "Item" section.
In addition, there is a section called VAT specification, where the VAT type, VAT rate, and total VAT amount for each line item are specified.
Note: To add a new line to the credit memo, you must be in edit mode and use the Add Credit memo Line (+)-button.

How to fill in a credit memo line
In order to post a credit memo, it is necessary to fill in the required fields on the credit memo line. The required fields include:
-
Item Name
-
Number of items
-
Price
-
G/L Account (General Ledger Account)
-
General product posting group
-
VAT Product Posting Group
These fields must be filled in correctly to ensure correct posting of the credit memo.
Preview
Preview allows you to see how the credit memo will appear based on the details entered under the credit memo header, credit memo lines, and your payment details in the settings. This is the version of the credit memo that is generated as a PDF file when you click the Download button.
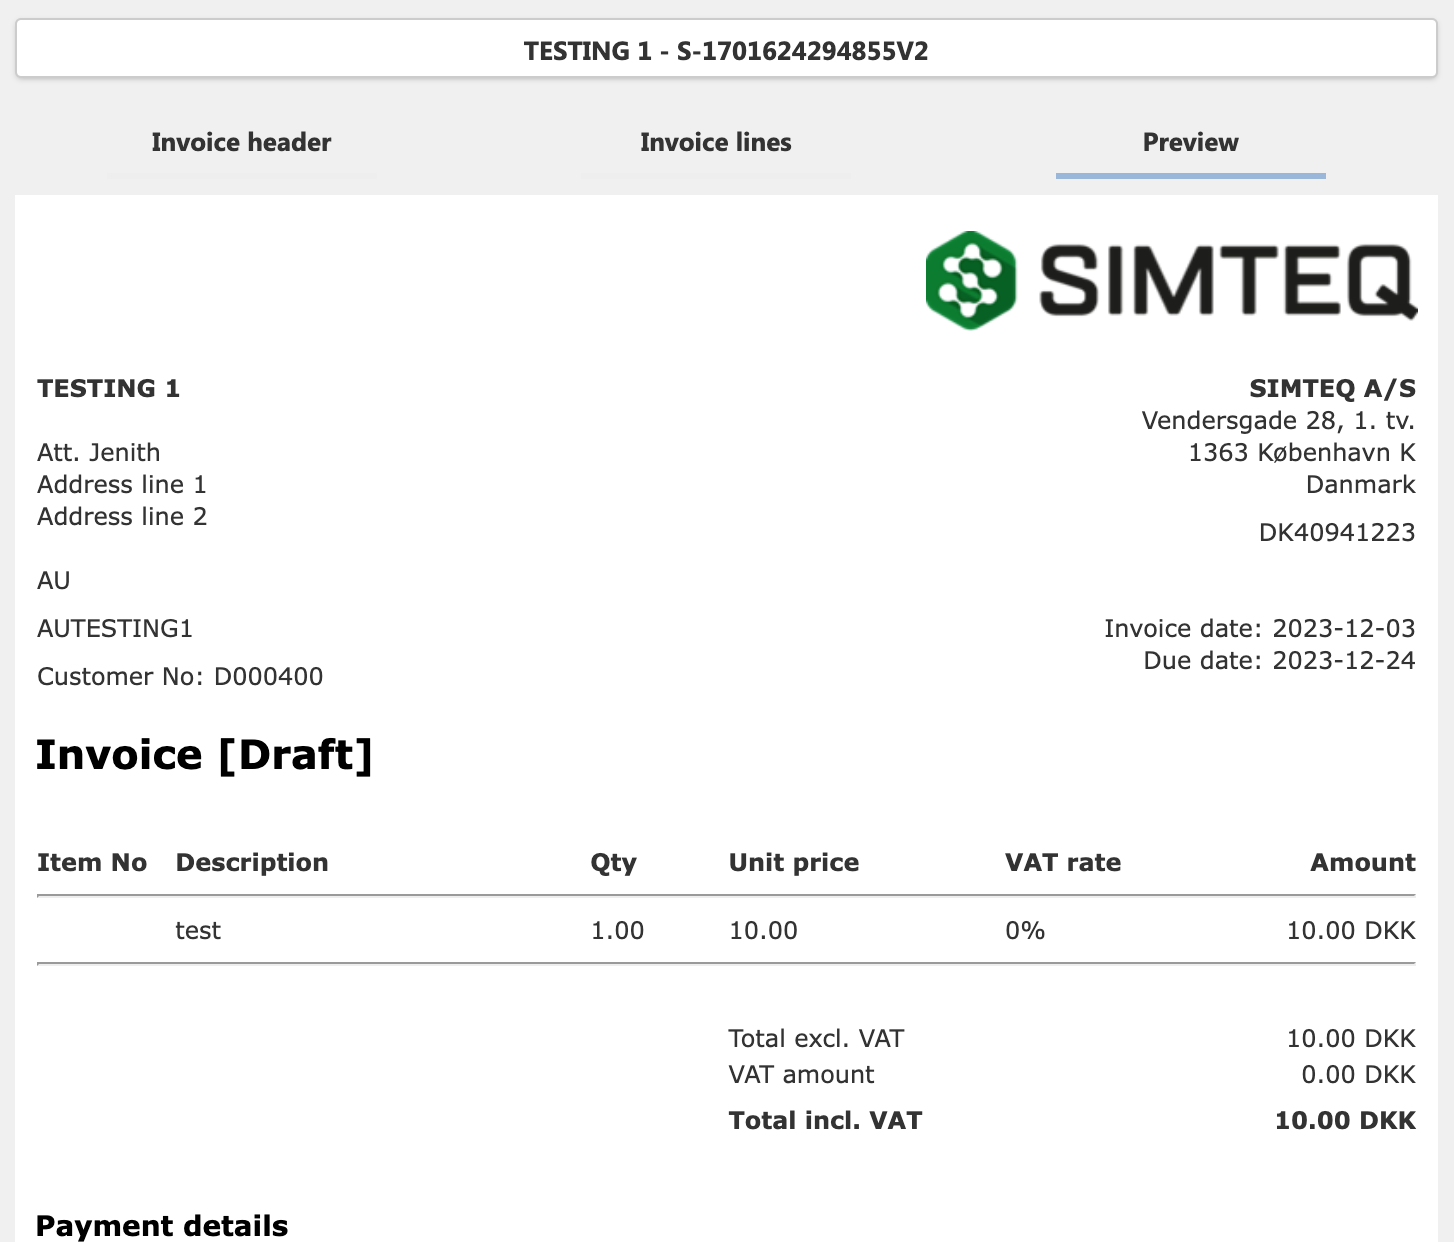
Please note that confidential information has been hidden from the image above.
Post credit memo
At the top right of the screen, you'll find two main buttons:
-
Post the draft (green button)
-
Delete the draft (Red button)
In order to post a credit memo, the user must have the necessary permissions to create credit memos and must ensure that all required fields in both the credit memo header and the credit memo lines are filled in correctly.

How to post a credit memo
-
Click Sales from the menu, and then click Create credit memo.
-
Click Add credit memo.
-
Select the customer and click Create new.
-
Fill in the required fields in the credit memo header.
-
Click Credit memo lines.
-
Select the item number or fill in the required fields manually.
-
Click Save.
-
Click on the green Post credit memo button.
Delete credit memo
The X (Delete) button is used to delete a created credit memo. This may be necessary if the credit memo has been created by mistake, contains incorrect information, or if the transaction needs to be cancelled in some other way.

How to delete a credit memo in draft form
-
Click Sales from the menu, and then click Create credit memo.
-
Select the desired credit memo in the table view.
-
Click the X (Delete Credit memo) button.
Edit credit memo
The Edit button is used to make changes to the selected credit memo. It is relevant to edit a credit memo if there is a need to correct errors, add or update information, adjust prices or quantities, or update customer details before the credit memo is posted or sent.

How to edit a credit memo in draft form
-
Click Sales from the menu, and then click Create credit memo.
-
Select the credit memo in the table view.
-
Click the Edit button.
-
Make the desired changes in the appropriate fields.
-
Click Save.
-
If you regret your changes, you can click the Revert button.
In edit mode, you can also copy details from a previous credit memo that is either in draft form or has already been posted.

How to copy from a previous credit memo
-
Click Sales from the menu, and then click Create credit memo.
-
Select the desired credit memo in the table view.
-
Click the Edit button.
-
Click the Copy Credit memo button.
-
Select the credit memo you want to copy from and press Copy.
-
Check the credit memo header and credit memo lines.
-
Click Save.
If you regret your changes, you can click the Return button.
Download credit memo
Once all credit memo details has been entered, you have the option to download the credit memo as a PDF file. This is necessary if you want to store or print the credit memo in PDF format. Otherwise, the system will automatically send the credit memo to the customer.

How to download a draft credit memo as a PDF
-
Click Sales from the menu, and then click Create credit memo.
-
Select the desired credit memo in the table view.
-
Click the Download button.
Button Overview

Navigation buttons for the table: Used to navigate back and forth between the different credit memos in the table.

Displays: Allows you to choose how many items to display per page in the table.

Download: Used to download the selected credit memo as a PDF file.

Edit: Used to edit the selected credit memo details.

X (Delete): Used to delete the selected credit memo.

Post credit memo: Used to post the selected credit memo, making it final and sending it to the customer