Create payments
Bank → Create payments lists every invoice and expense that has been posted and is waiting to be paid. You select what to pay, and the selection becomes a batch.
Paying from here means no visit to the bank, no downloading files and no manual steps: the batch goes to the bank once it has been approved.
What the list shows
| Column | Meaning |
|---|---|
| Vendor name | The vendor or recipient. |
| Invoice number | The invoice's reference. |
| Discount amount | The early-payment discount available, where discounts are switched on. |
| Discount date | The last day the discount can be taken. |
| Due date | When payment is due. |
| Payment date | When payment is scheduled. |
| Amount | The total, in its own currency. |
Click a column header to sort by it.
By default the list shows the payments that still need someone to act: created, pending, rejected and failed. Change the status filter to see the rest.
Early-payment discounts
If your company uses early-payment discounts, the discount amount and date are calculated for each payment. They appear when discounts are enabled in Bank → Settings and the vendor has discount terms set up in Vendor setup. The terms come from your ERP.
A typical term is "1%, 10 days, 30 days" — 1% off if paid within 10 days, otherwise due at 30. The discount amount shows what would be deducted; the discount date shows the last day to take it.
The ⓘ markers
An ⓘ beside an amount means a credit memo exists for that vendor. It can reduce a payment that has not been made yet, or be set against a future payment if the invoice is already paid.
An ⓘ beside a vendor name means the vendor's reg. no. or account number has changed since the invoice was reported, so you can check the payment is going to the right place.
Opening and editing a payment
Click the invoice number, or use Expand on the right — both open the payment's details and its activity log.
Edit lets you change, before the payment is created:
- Payment type — a local type such as FIK, KID or Giro, a bank transfer, an international payment, or marking the invoice as paid.
- Payment info — the fields the chosen type needs, such as IBAN, SWIFT/BIC, branch number or account number.
- Purpose code — required by the bank above certain thresholds, for example 100,000 NOK or 150,000 SEK, for regulatory reporting.
- Message to receiver — what the recipient sees in their bank.
Reset undoes changes you have made.
Messages longer than 140 characters
A message over 140 characters is delivered as an attached document rather than in the payment line. For that to reach the vendor, their payment notification email must be filled in on the creditor in your ERP. We recommend setting one up for your own company too, under Bank → Settings → Payment receipts.
Paying part of an invoice
Click the amount field and type the amount to pay. It cannot exceed the original posted amount. The remaining amount is shown once a partial payment exists, and hovering over the field shows how much has already been paid.
Partial payments reconcile automatically as they are processed, reducing what is outstanding on the open entry, and continue to do so until the entry is fully matched.
Creating the batch
- Tick the payments to include. The number selected is shown beside the green Create button.
- Choose the payment date.
- Choose the bank account to pay from, under Select housebank.
- Click the green Create button.
- Check the batch preview. It appears every time, whether the batch holds one payment or many.
- Enter your PIN.
- Enter the one-time code sent to your phone.
- Confirm.
Reset selection of payments clears all ticks.
Steps 6 and 7 only appear if you hold a mandate on the account yourself.
Creating and approving are two different rights
There is no separate step that submits the batch for approval. If you create the batch and hold a mandate, you approve it at the same time — which is why you are asked for your PIN and one-time code straight away.
If you only have the right to create payments and no mandate, you stop after step 5. The batch then waits for a colleague with a mandate on the Approve payments page.
Both rights are granted per bank account under User setup, so you can be allowed to create on one account and only approve on another.
A bank account has to be set up before any payment can be made from it.
The total, across currencies
A bar shows the total of everything selected. Where the selection mixes currencies, the amounts are converted and presented as an estimate in the company's own currency. Click Total in DKK to see the amounts broken down per currency.
Export and import
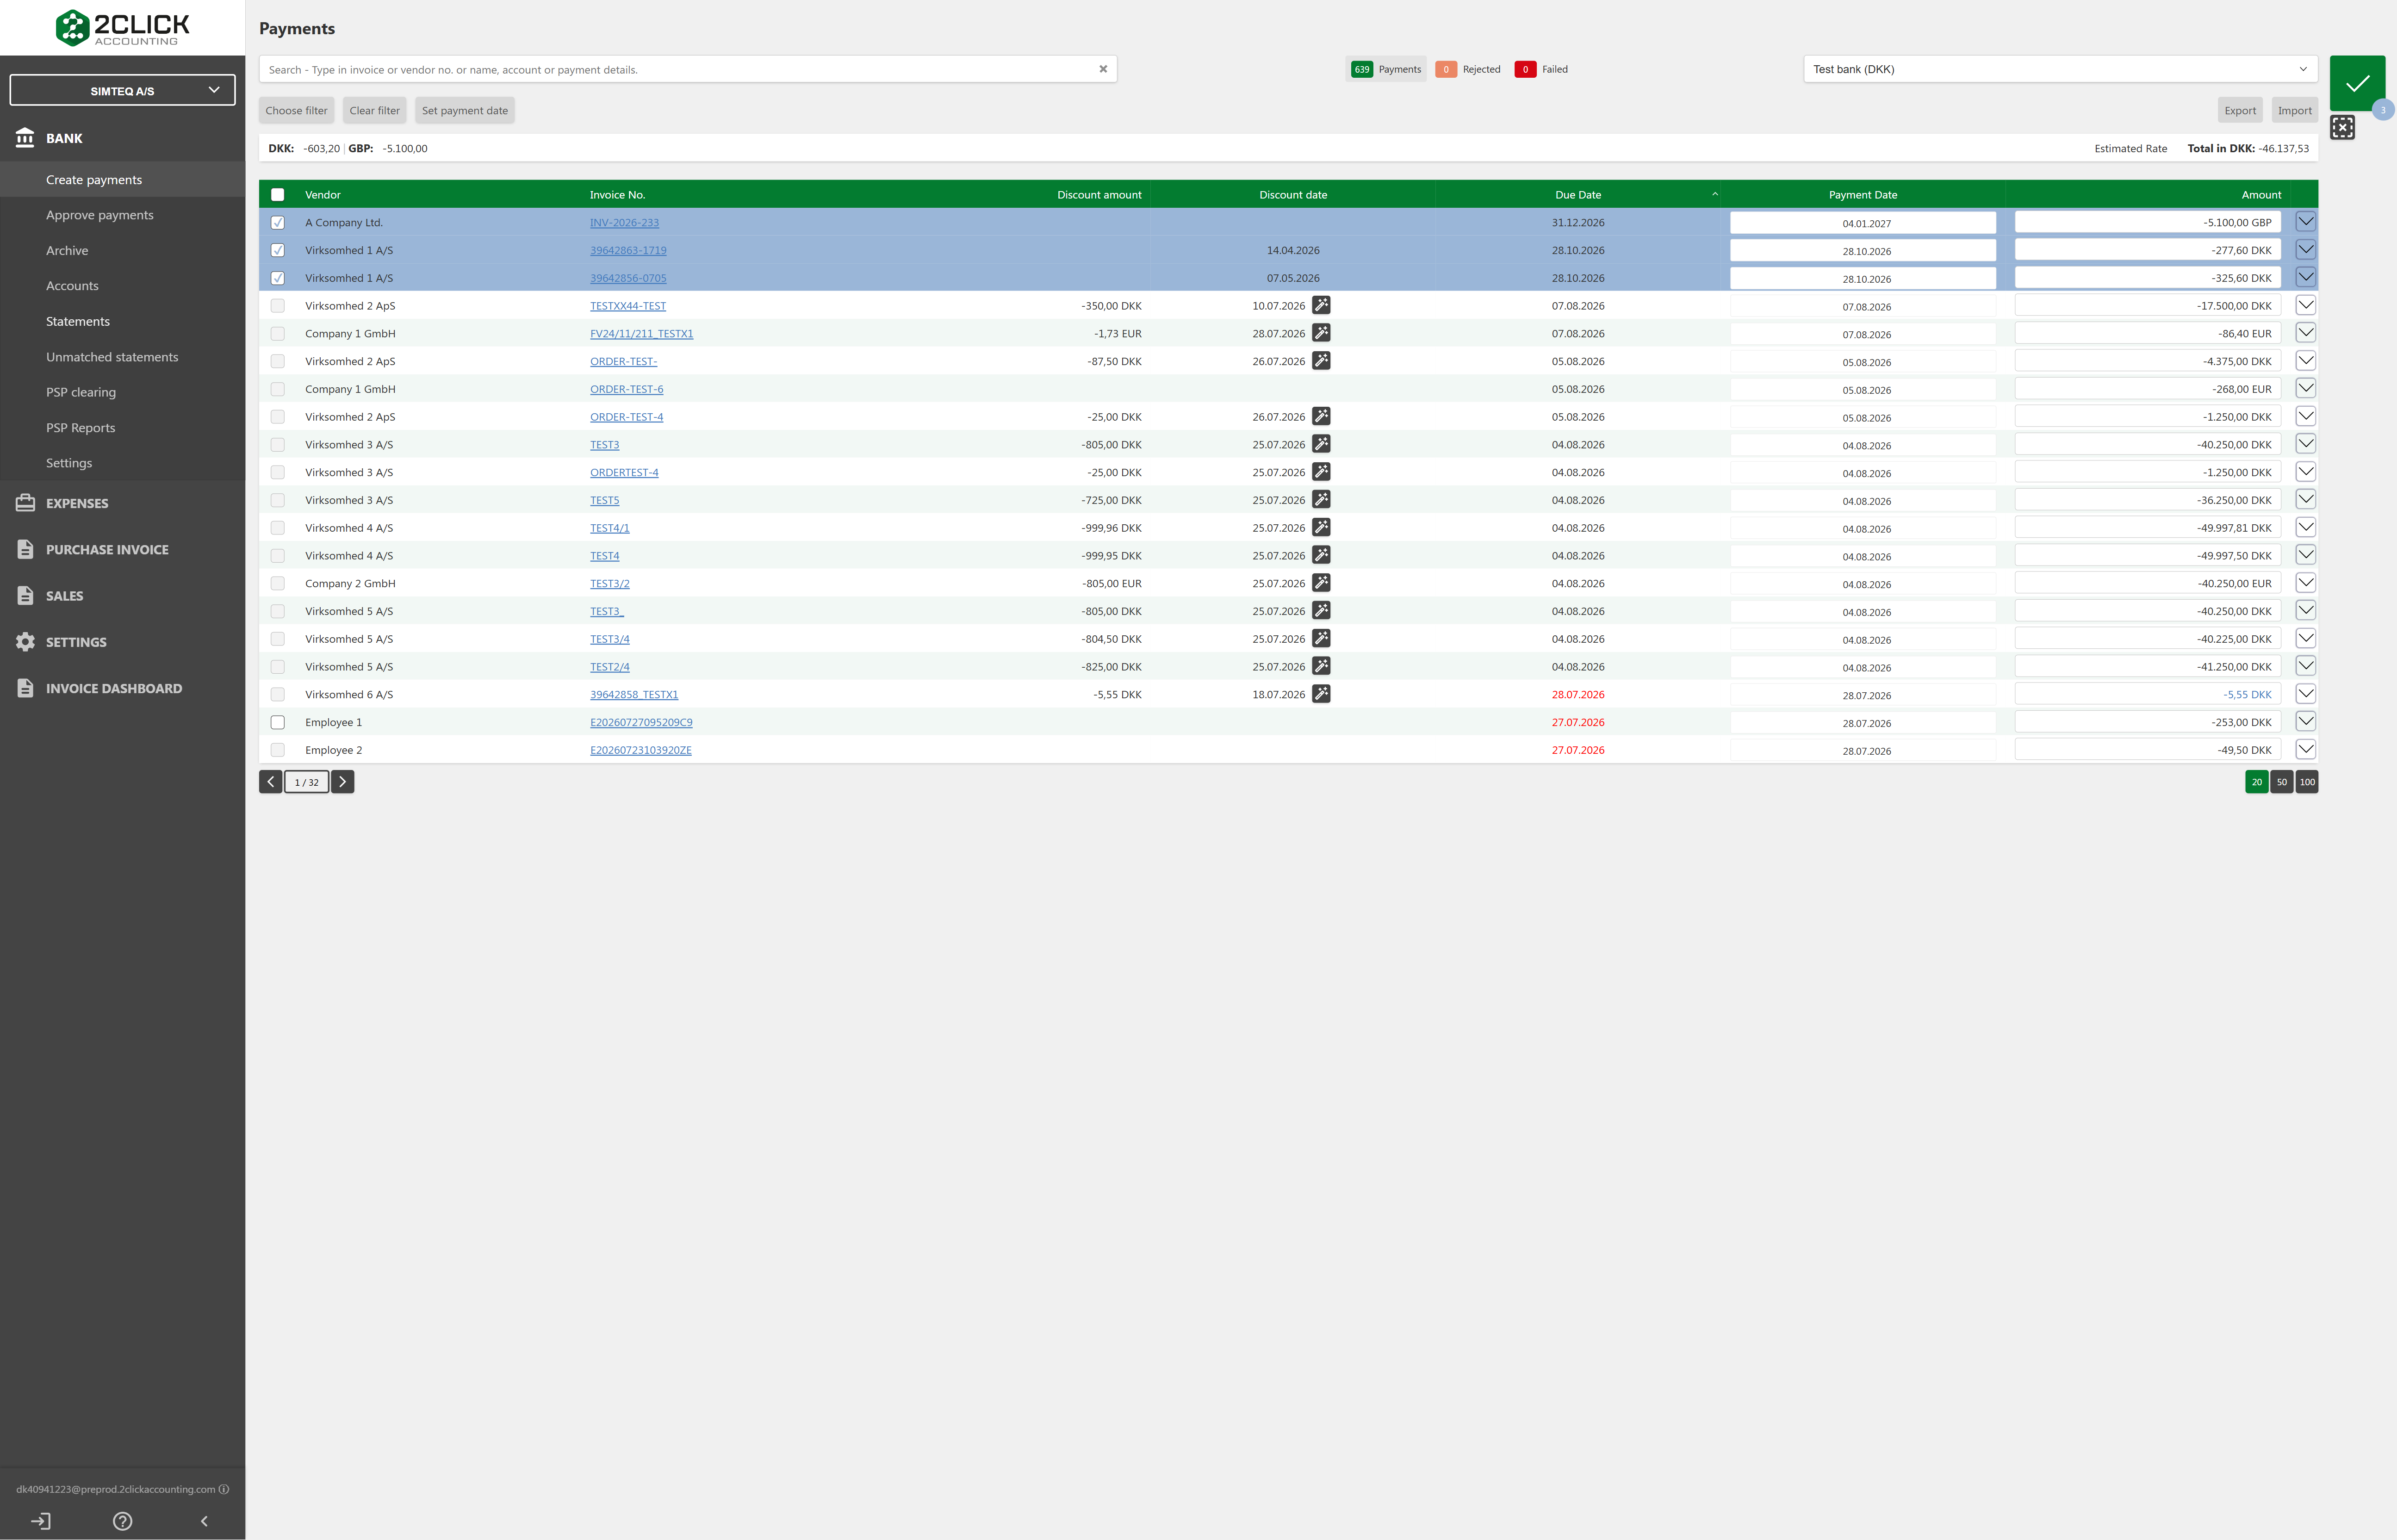
Confidential information has been hidden in the image above.
Export downloads the active payments in the list as a CSV file, including the filters and data. You can edit it in Excel and bring it back with Import, which saves changing payments one at a time.
When a payment cannot be ticked
Hover over a greyed-out payment to see why:
| Message | What it means |
|---|---|
| Read-only access to Create payments | You may view the page but not create payments. |
| You do not have the Create payment permission on this bank account | Your access does not cover this particular account. |
| Your user account has no access to sign payments | Your user is not set up as a bank user in the company. |
| The payment can only be selected in certain statuses | The entry is already moving through the payment process. |
| Manual payment method | The entry is paid outside 2Click Accounting. |
| Negative amount with no payment method | Usually a credit note, to be offset instead. |
Manual payment
To pay something that has no open entry in the ERP, choose Manual payment. This requires manual payments to be enabled for the company, and a single company to be selected — not the consolidated view.
Payment details. Fill in the creditor name and address, the payment method, the amount, and whatever details that method requires. Choosing a vendor prefills the address, and you can correct it. The vendor is optional — leave it empty to pay someone with no vendor account.
Payment file (XML). Attach a pain.001 file of at most 10 MB. It is sent to the bank exactly as it is. The payment date comes from the file where it states one; otherwise the payment keeps the date you choose.
Salary and batch-booked files
If the file is marked as a salary file or as batch booked, it is paid as one total and the individual transactions are not shown in the payment archive.