Bank
The Bank-module in Consolidated view includes the three pages: Create Payments, Approve Payments and Archive. These are very similar to the standard UI and setup, but with some minor differences and precautions that the user needs to note when using the Consolidated view.
Create Payments
The "Create Payments" page, is like almost every other page in the consolidated view, very similar to when only working in one company's 2Click application. Still, there are some important functions and settings that needs to be used for the module to work correctly:
Company filter
In the standard "Create Payments"-list the following filters are applicable:
-
Vendor
-
Invoice No.
-
(Discount Amount)
-
(Discount Date)
-
Due Date
-
Payment Date
-
Amount
-
House Bank
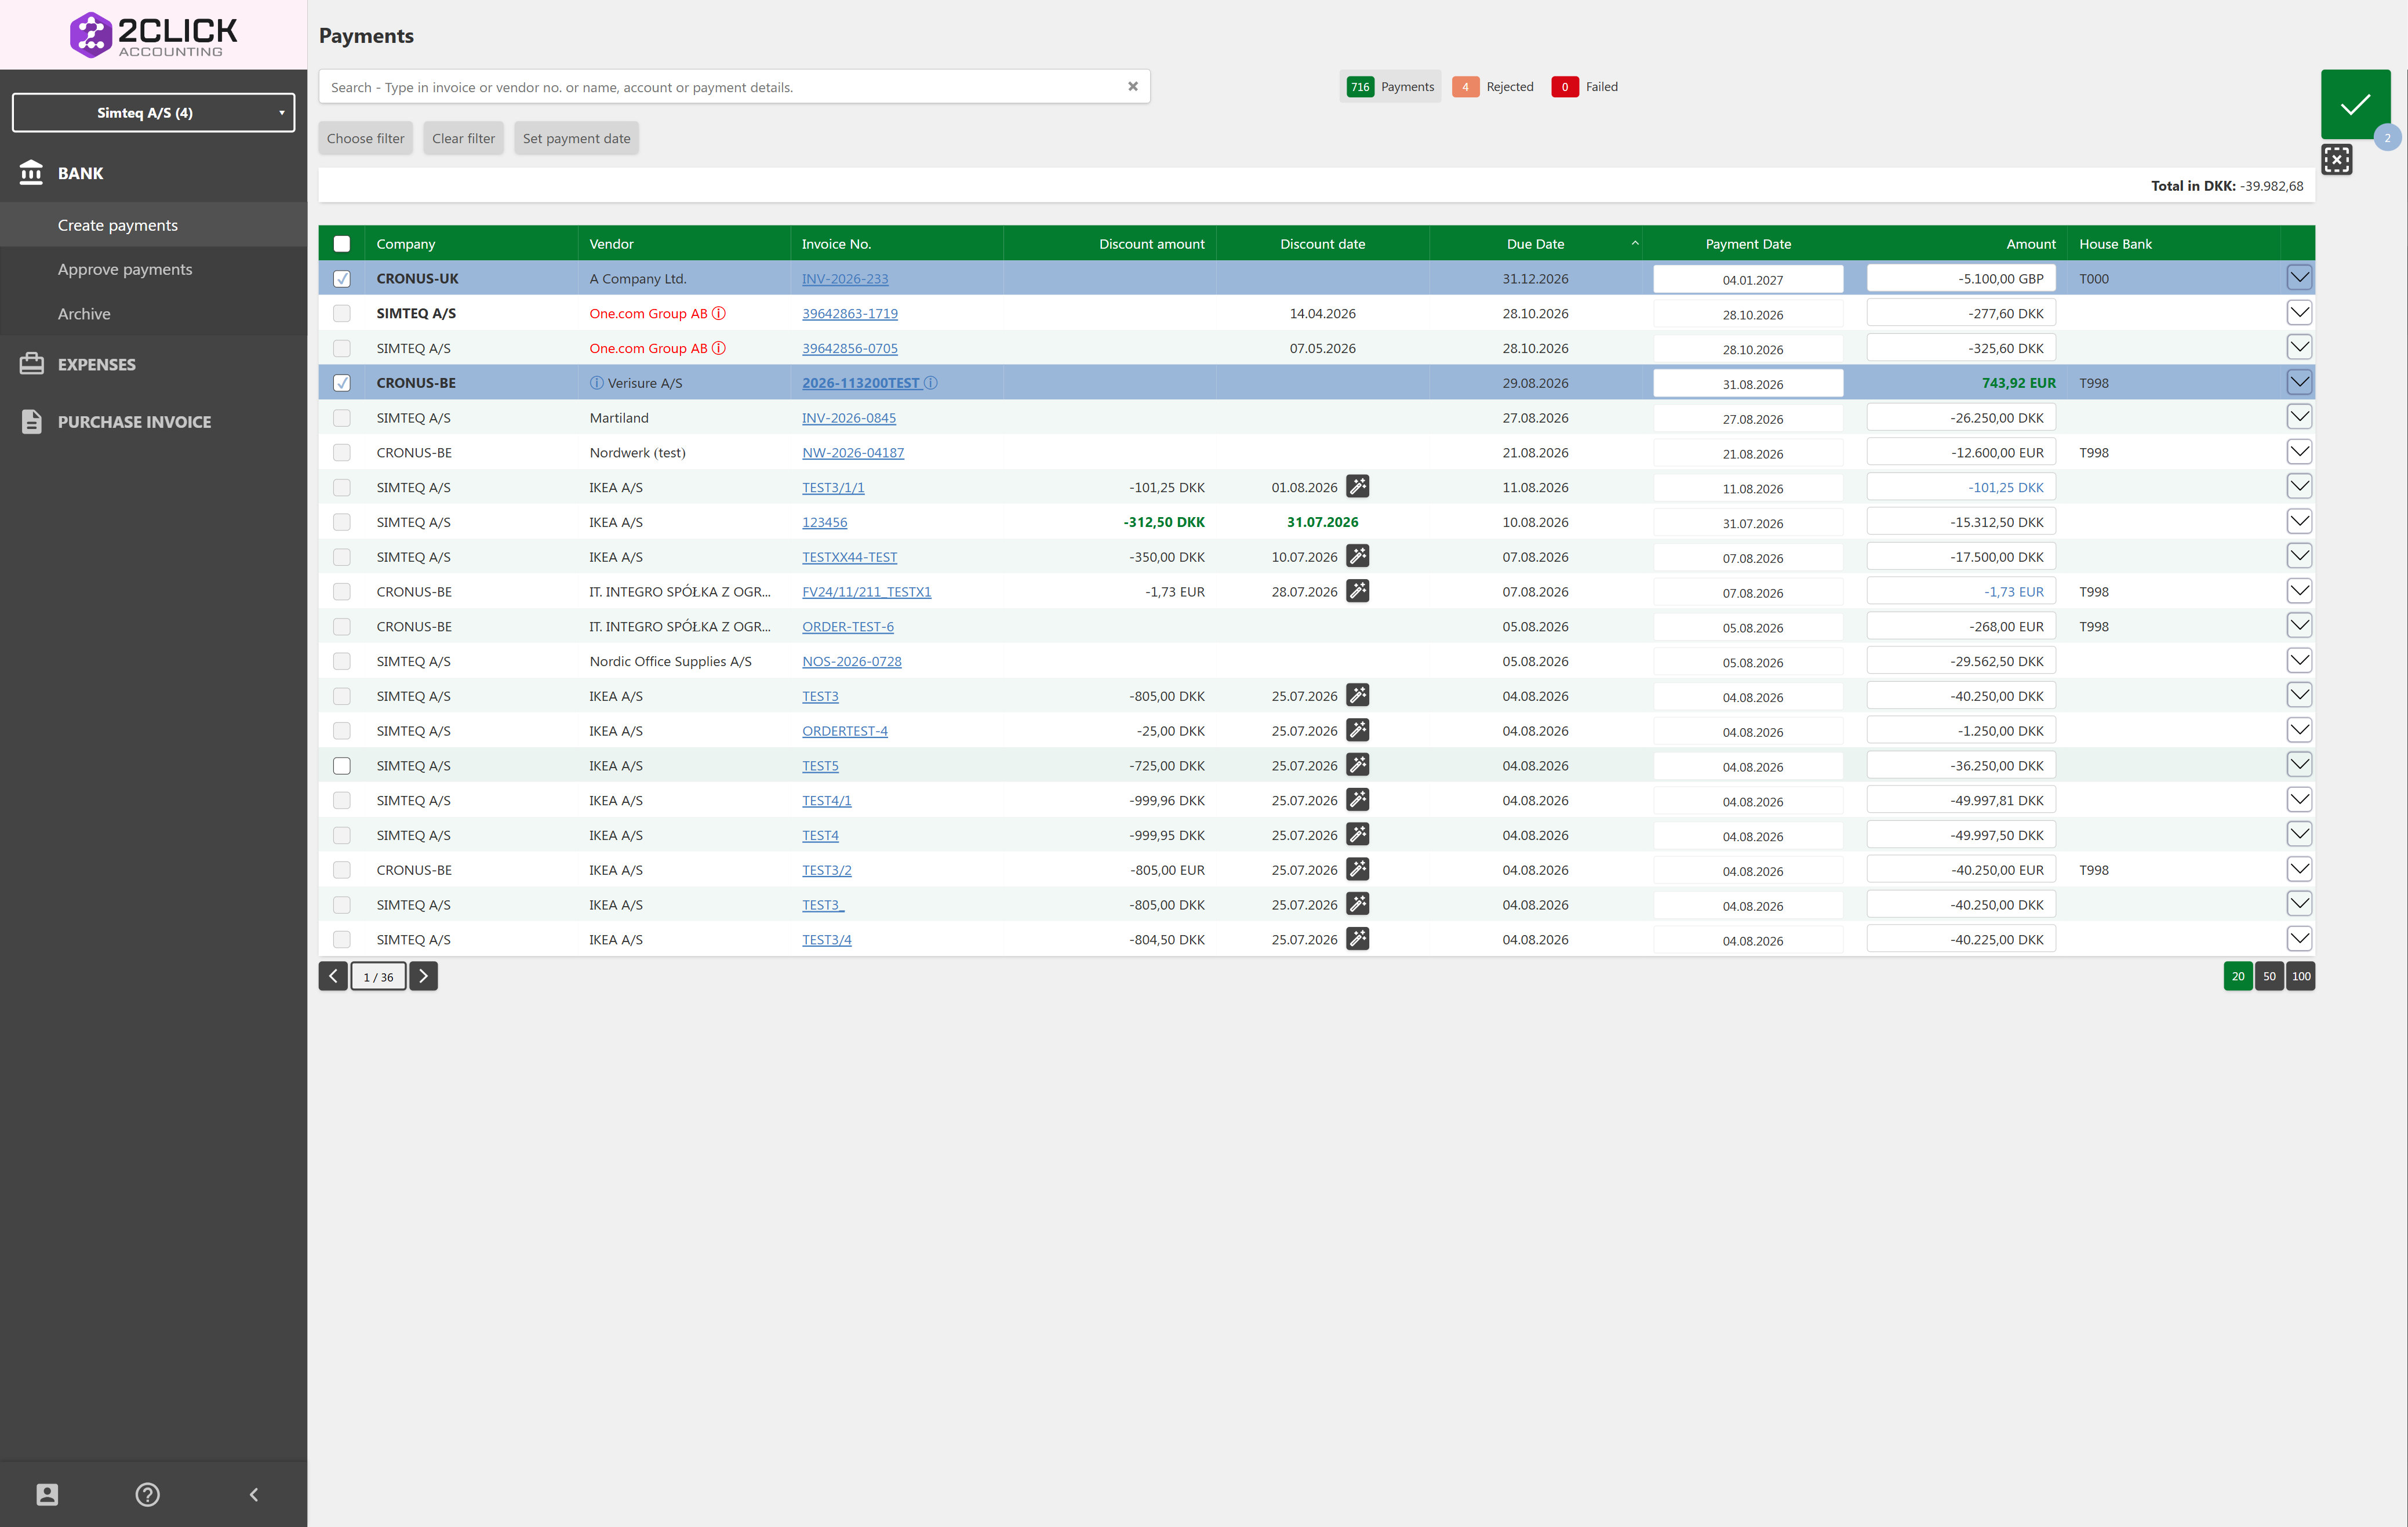
When using Consolidated view, there will be an additional filter on the left side of the table that states which of the companies in the consolidated view the selected payment belongs to, called "Company":
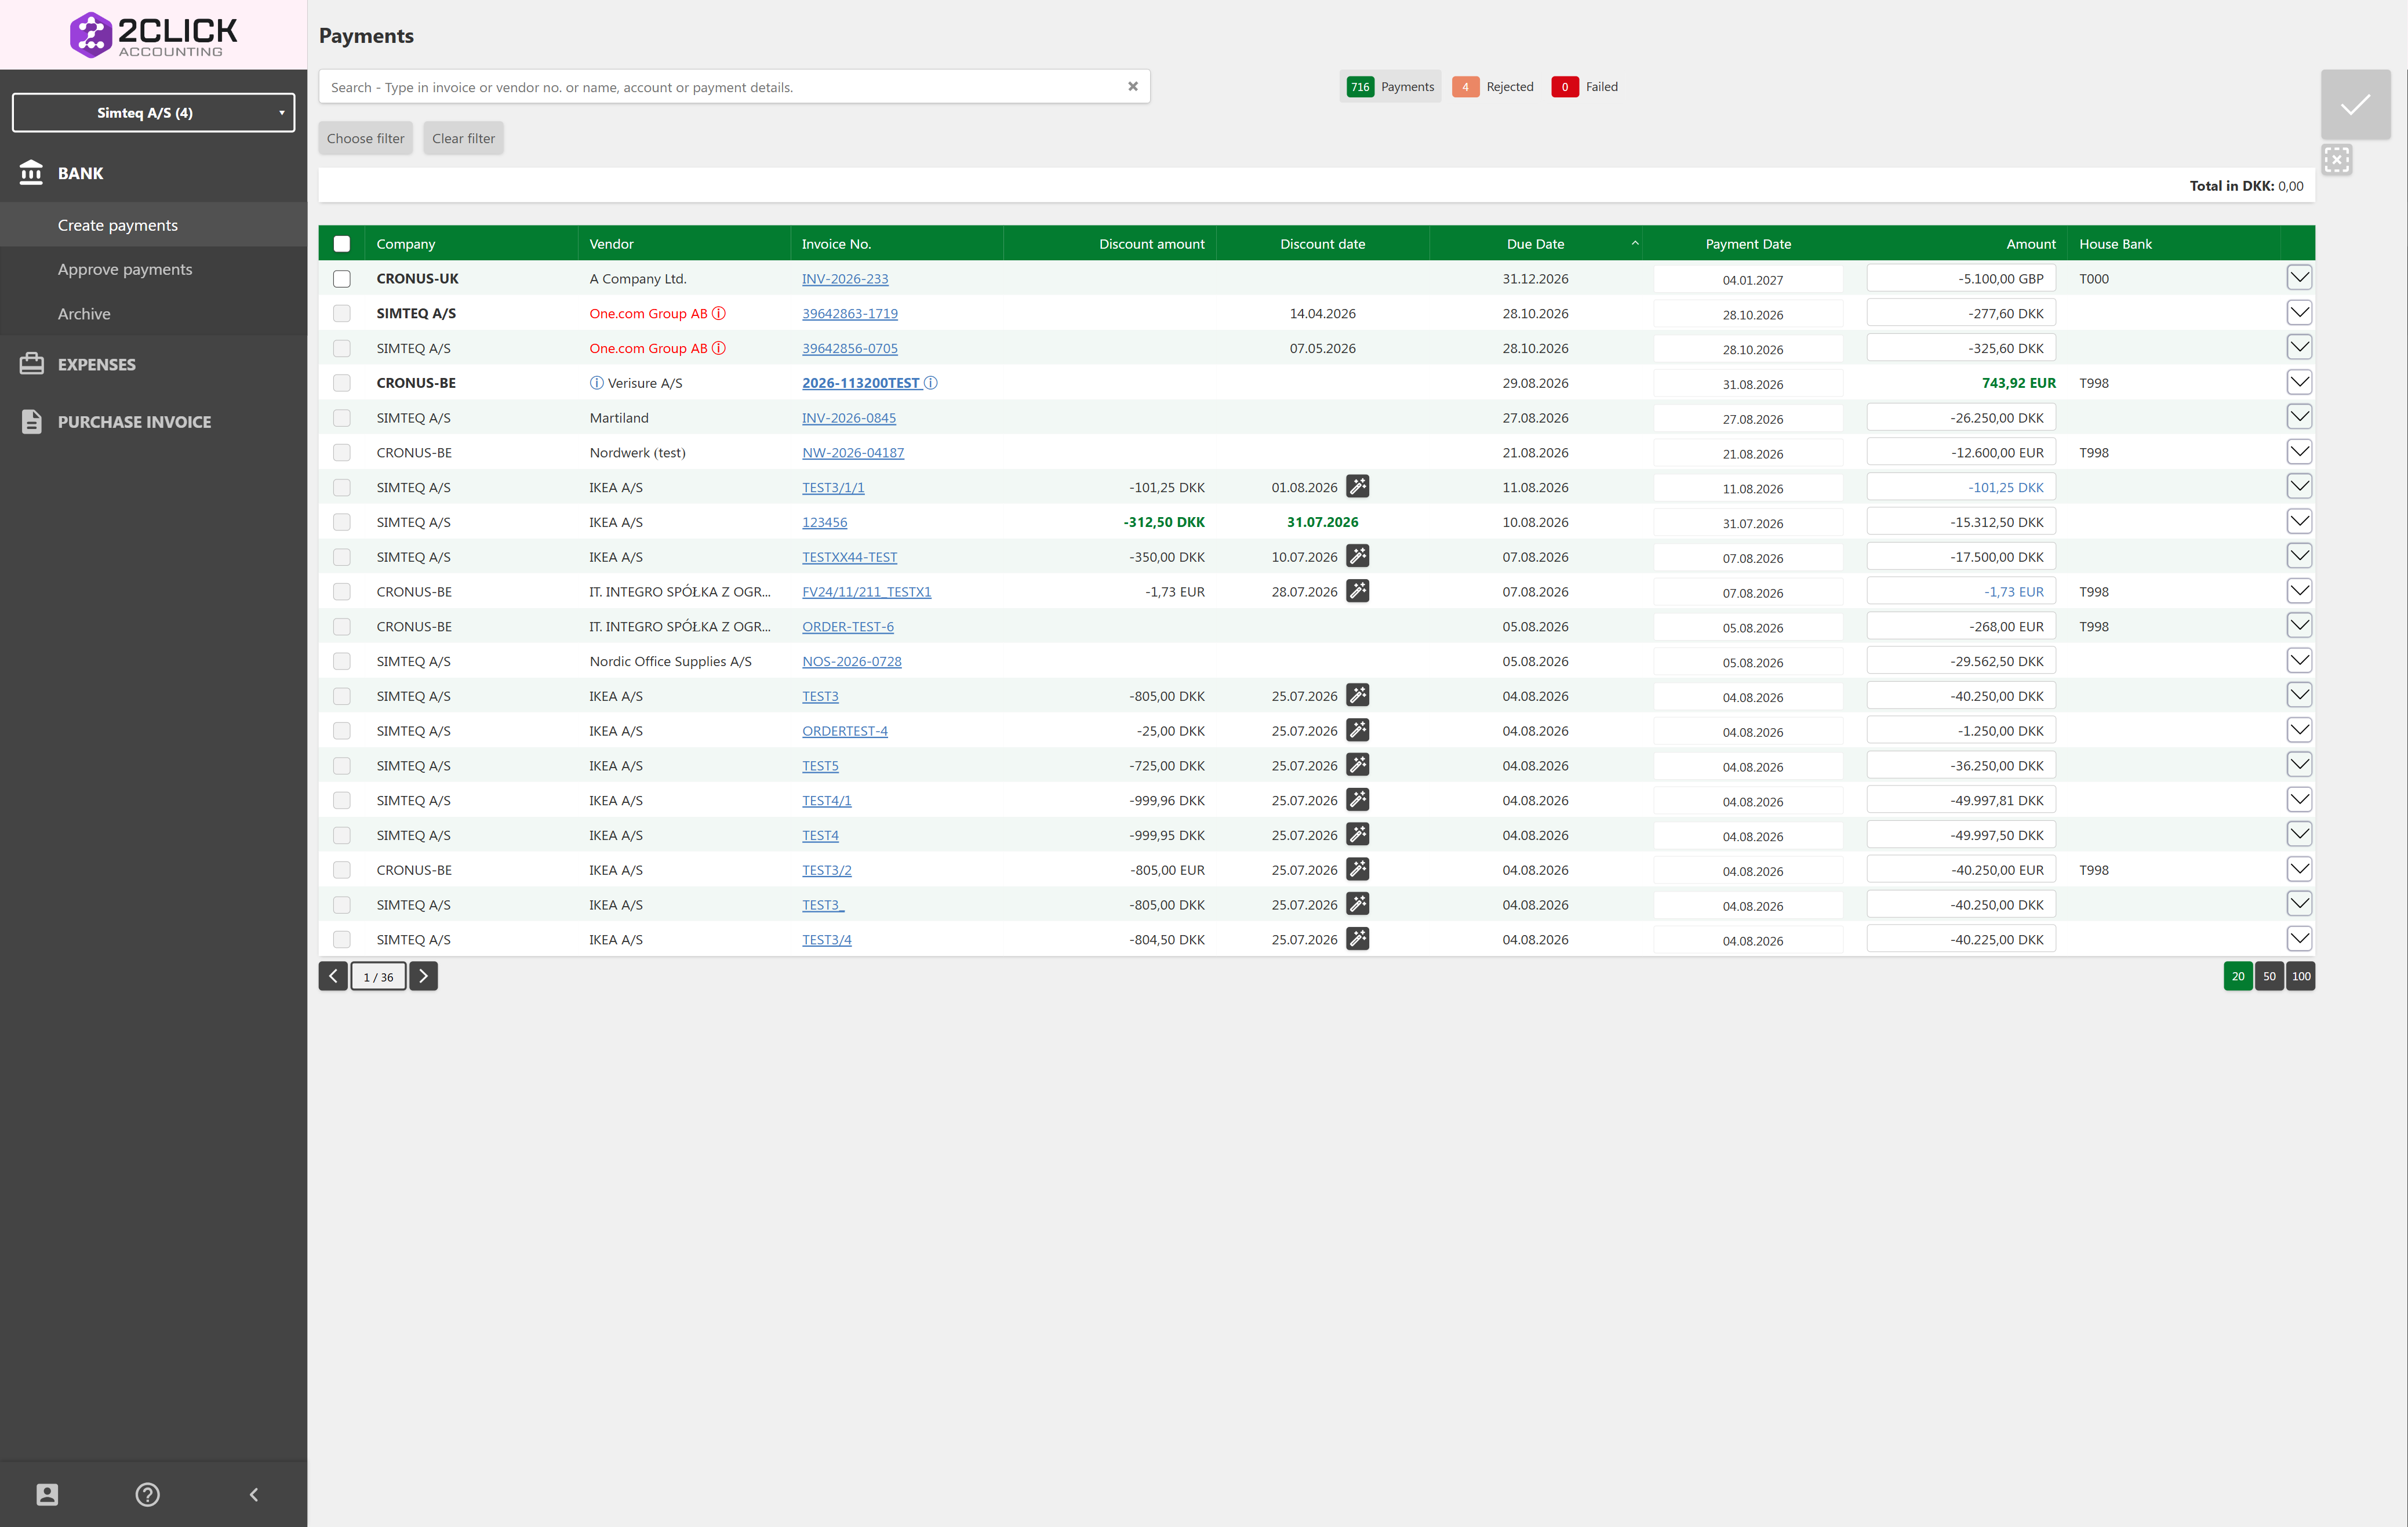
As you see marked in bold in the left filter column in the table, the different companies within the subscription is stated for each of their respective payments. This allows the user to keep track of which company actions are made for, even though they are using the consolidated view.
House bank
To create a payment for one of the companies in Consolidated View, a house bank must be set up for the payment's selected currency. This is done in the account settings for each respective company.
If a bank account has been assigned to a specific currency for a company, that account will automatically be used for all of that company's payments in that currency. The selected house bank account is also shown in the column furthest to the right in the payment table when creating payments in Consolidated View.

How to set default bank accounts for selected currencies
It is possible to assign certain bank account to apply for payments in certain currencies. This is done by going to the account-page in the Bank module for your desired company. Thereafter, you need to go to the bank account setup for one of your company's house bank accounts, by clicking the "Settings"-button for the desired account:
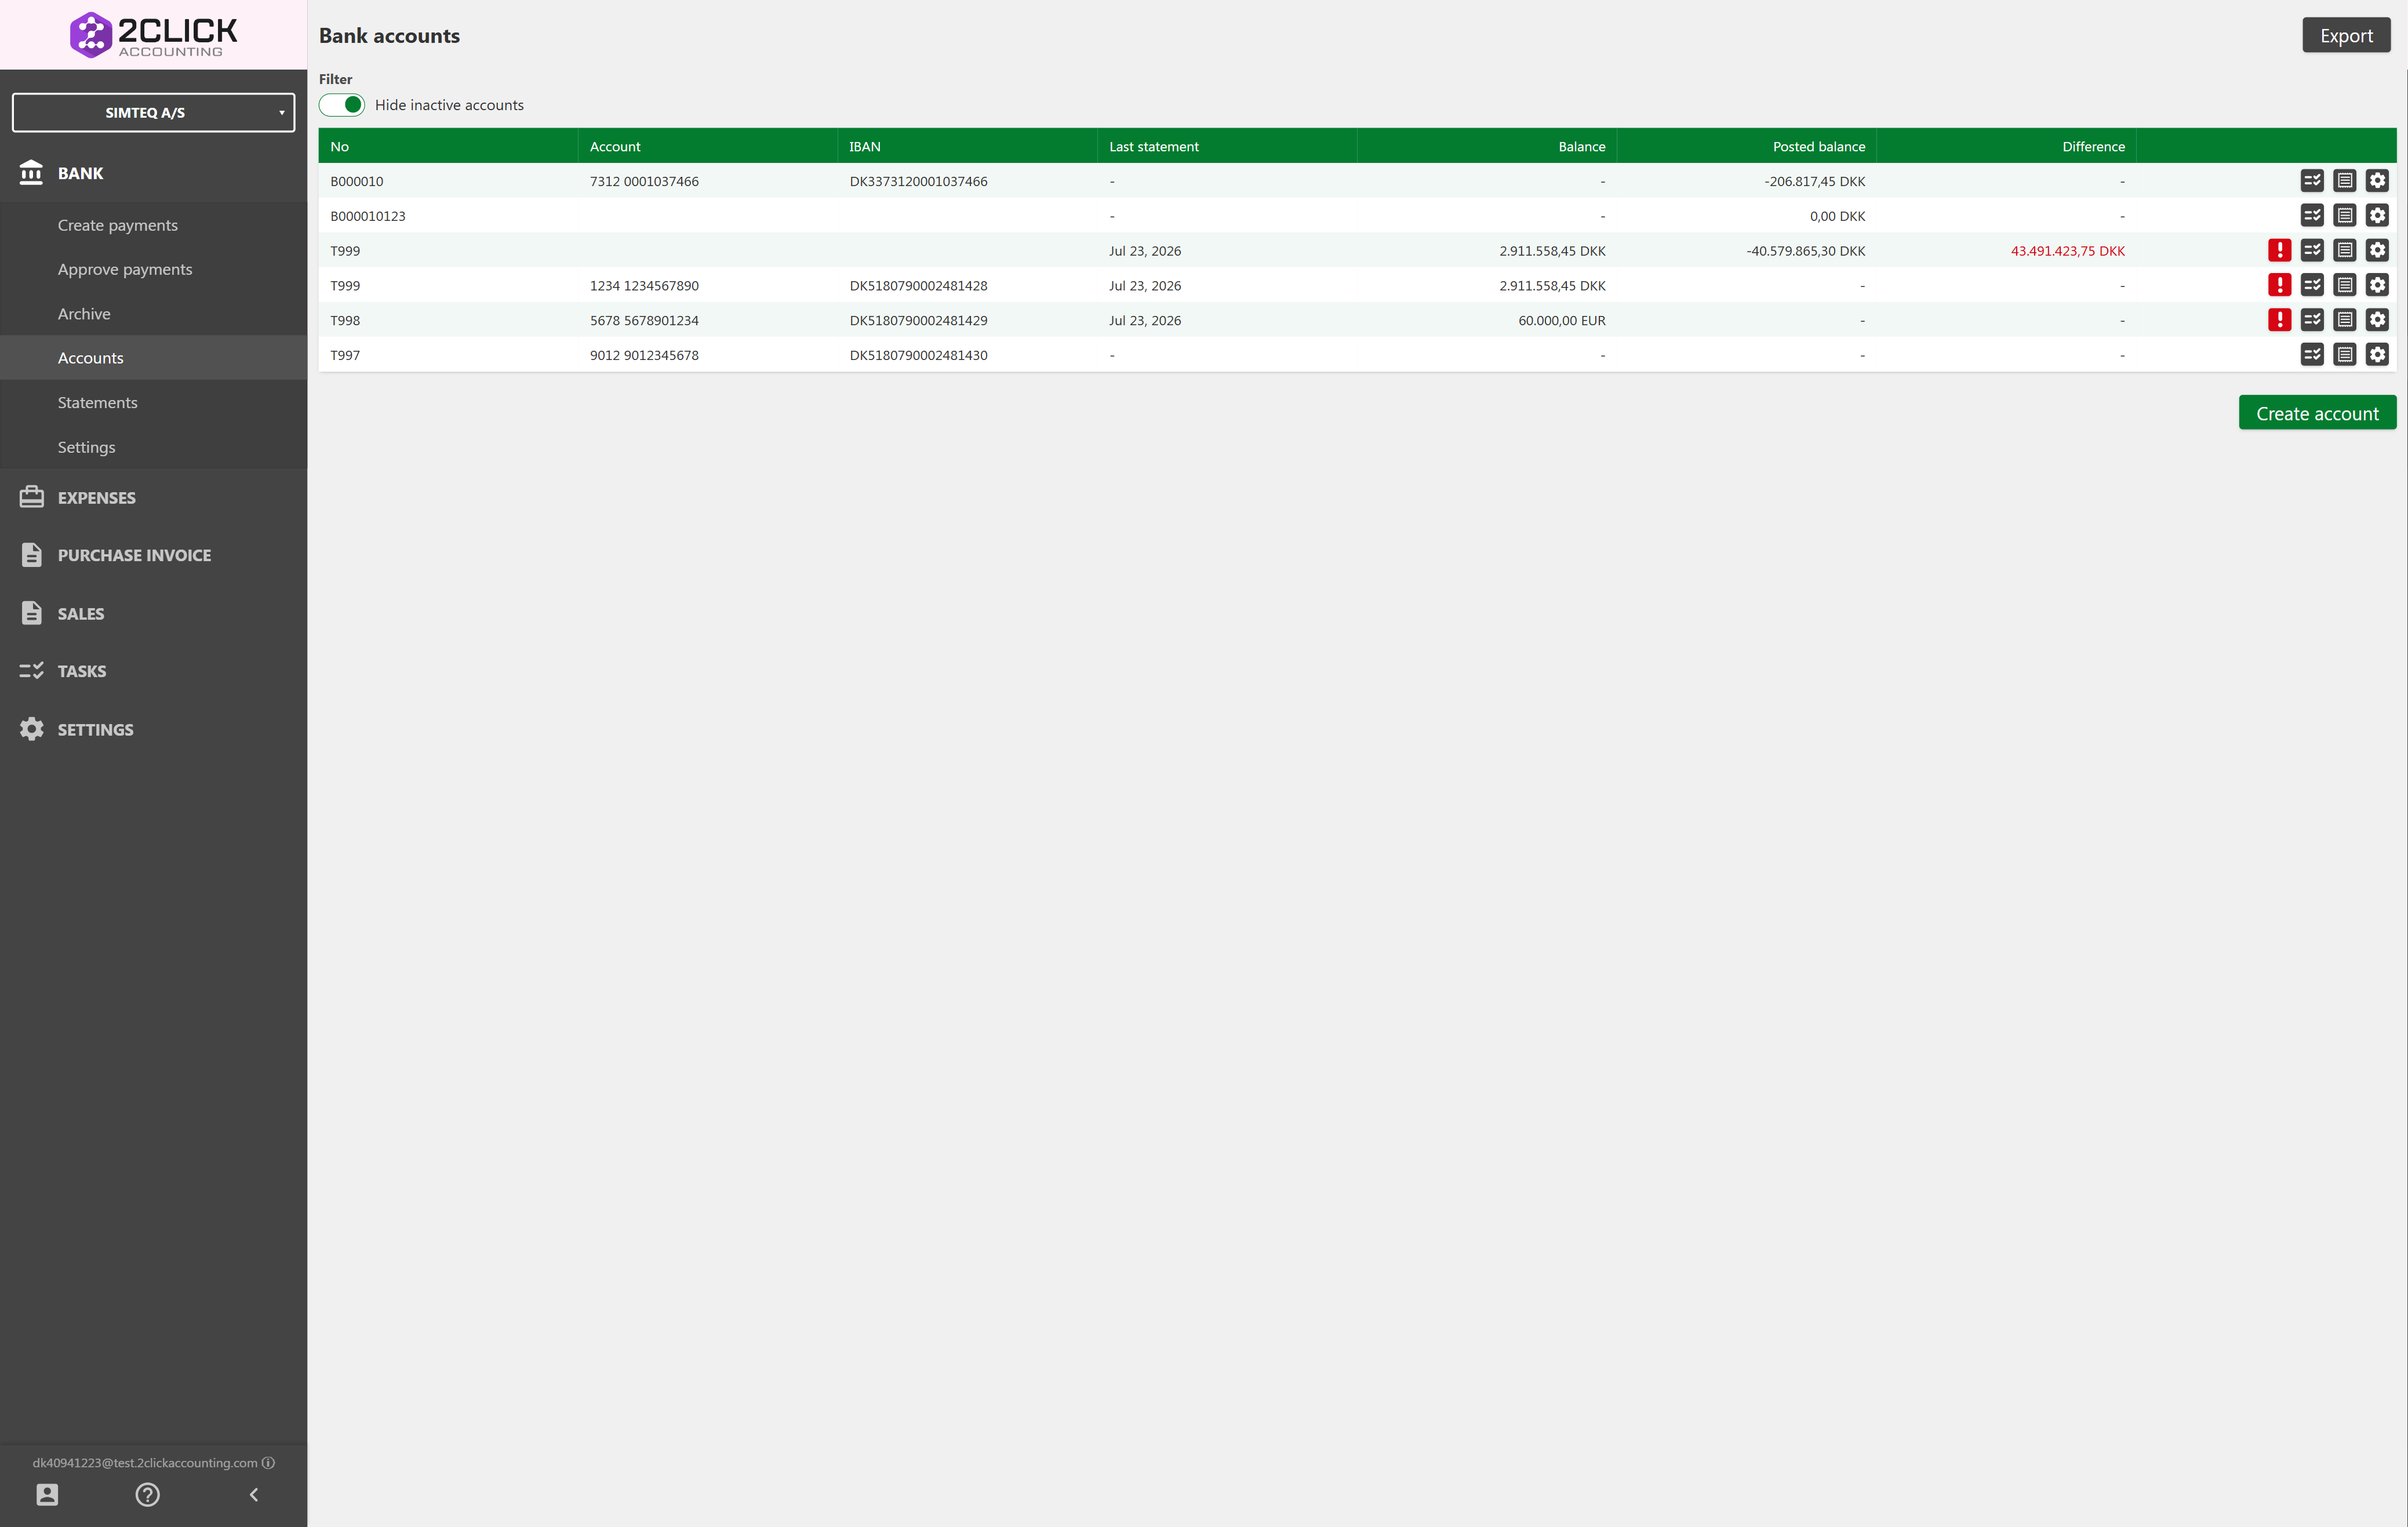
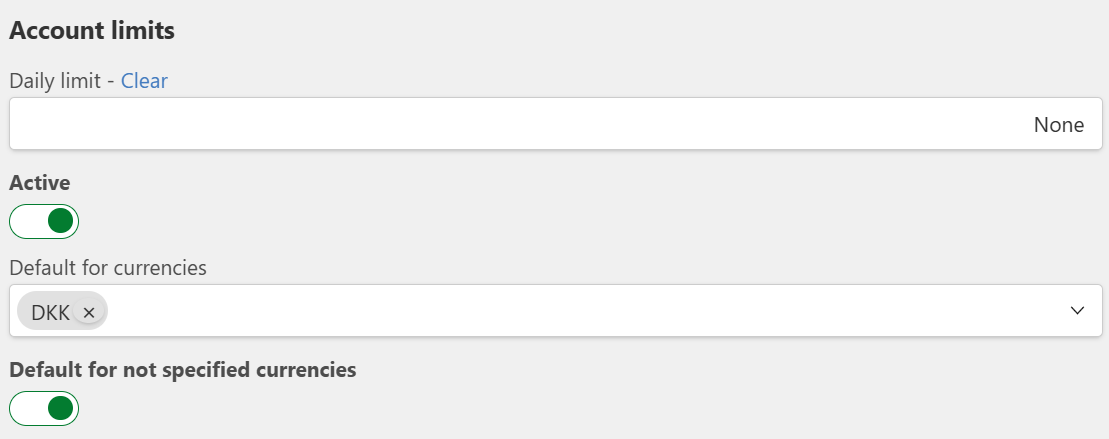
Seen on the picture to the right above, there are two important settings for a bank account to work for the consolidated view:
-
"Default for currencies" is where you can add the desired currencies your want the house bank account to apply for. There can be multiple currencies stated in the field, in which the account will be default for payments within.
-
"Default for not specified currencies": By activating this for an account, it will automatically apply for all payments of a currency that no other account is assigned to. This is often done for the company's main house bank account.
The two settings stated above are important for the setup of banking within the consolidated view, to ensure handling of payments across companies. Without a house bank assigned to a specific currency, there is no possibility of selecting a house bank for a payment in the consolidated view. The reason for this is to make it possible to create payment batches for different companies, using different accounts, at the same time.
Bank mandates
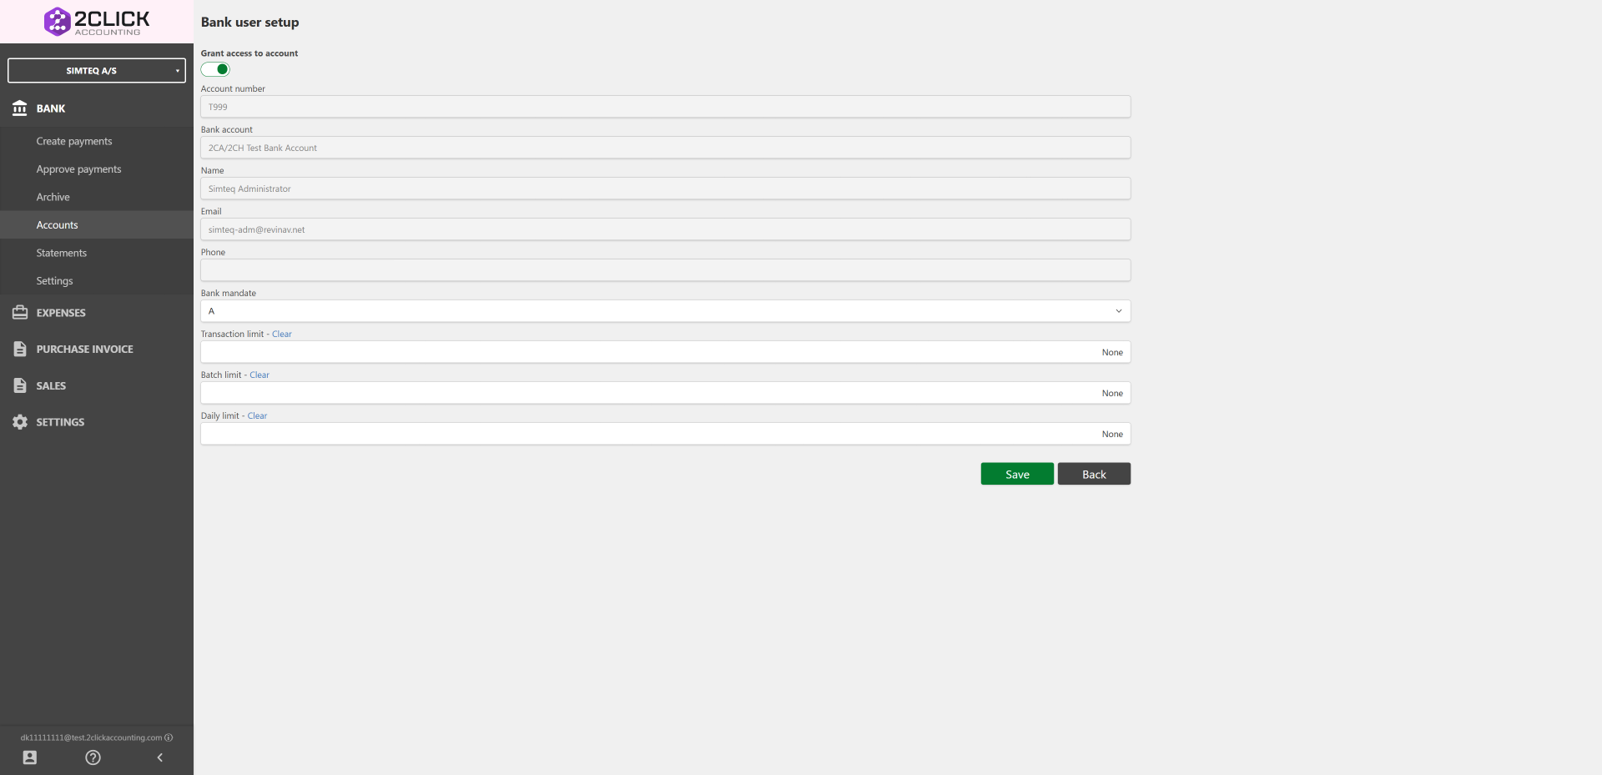
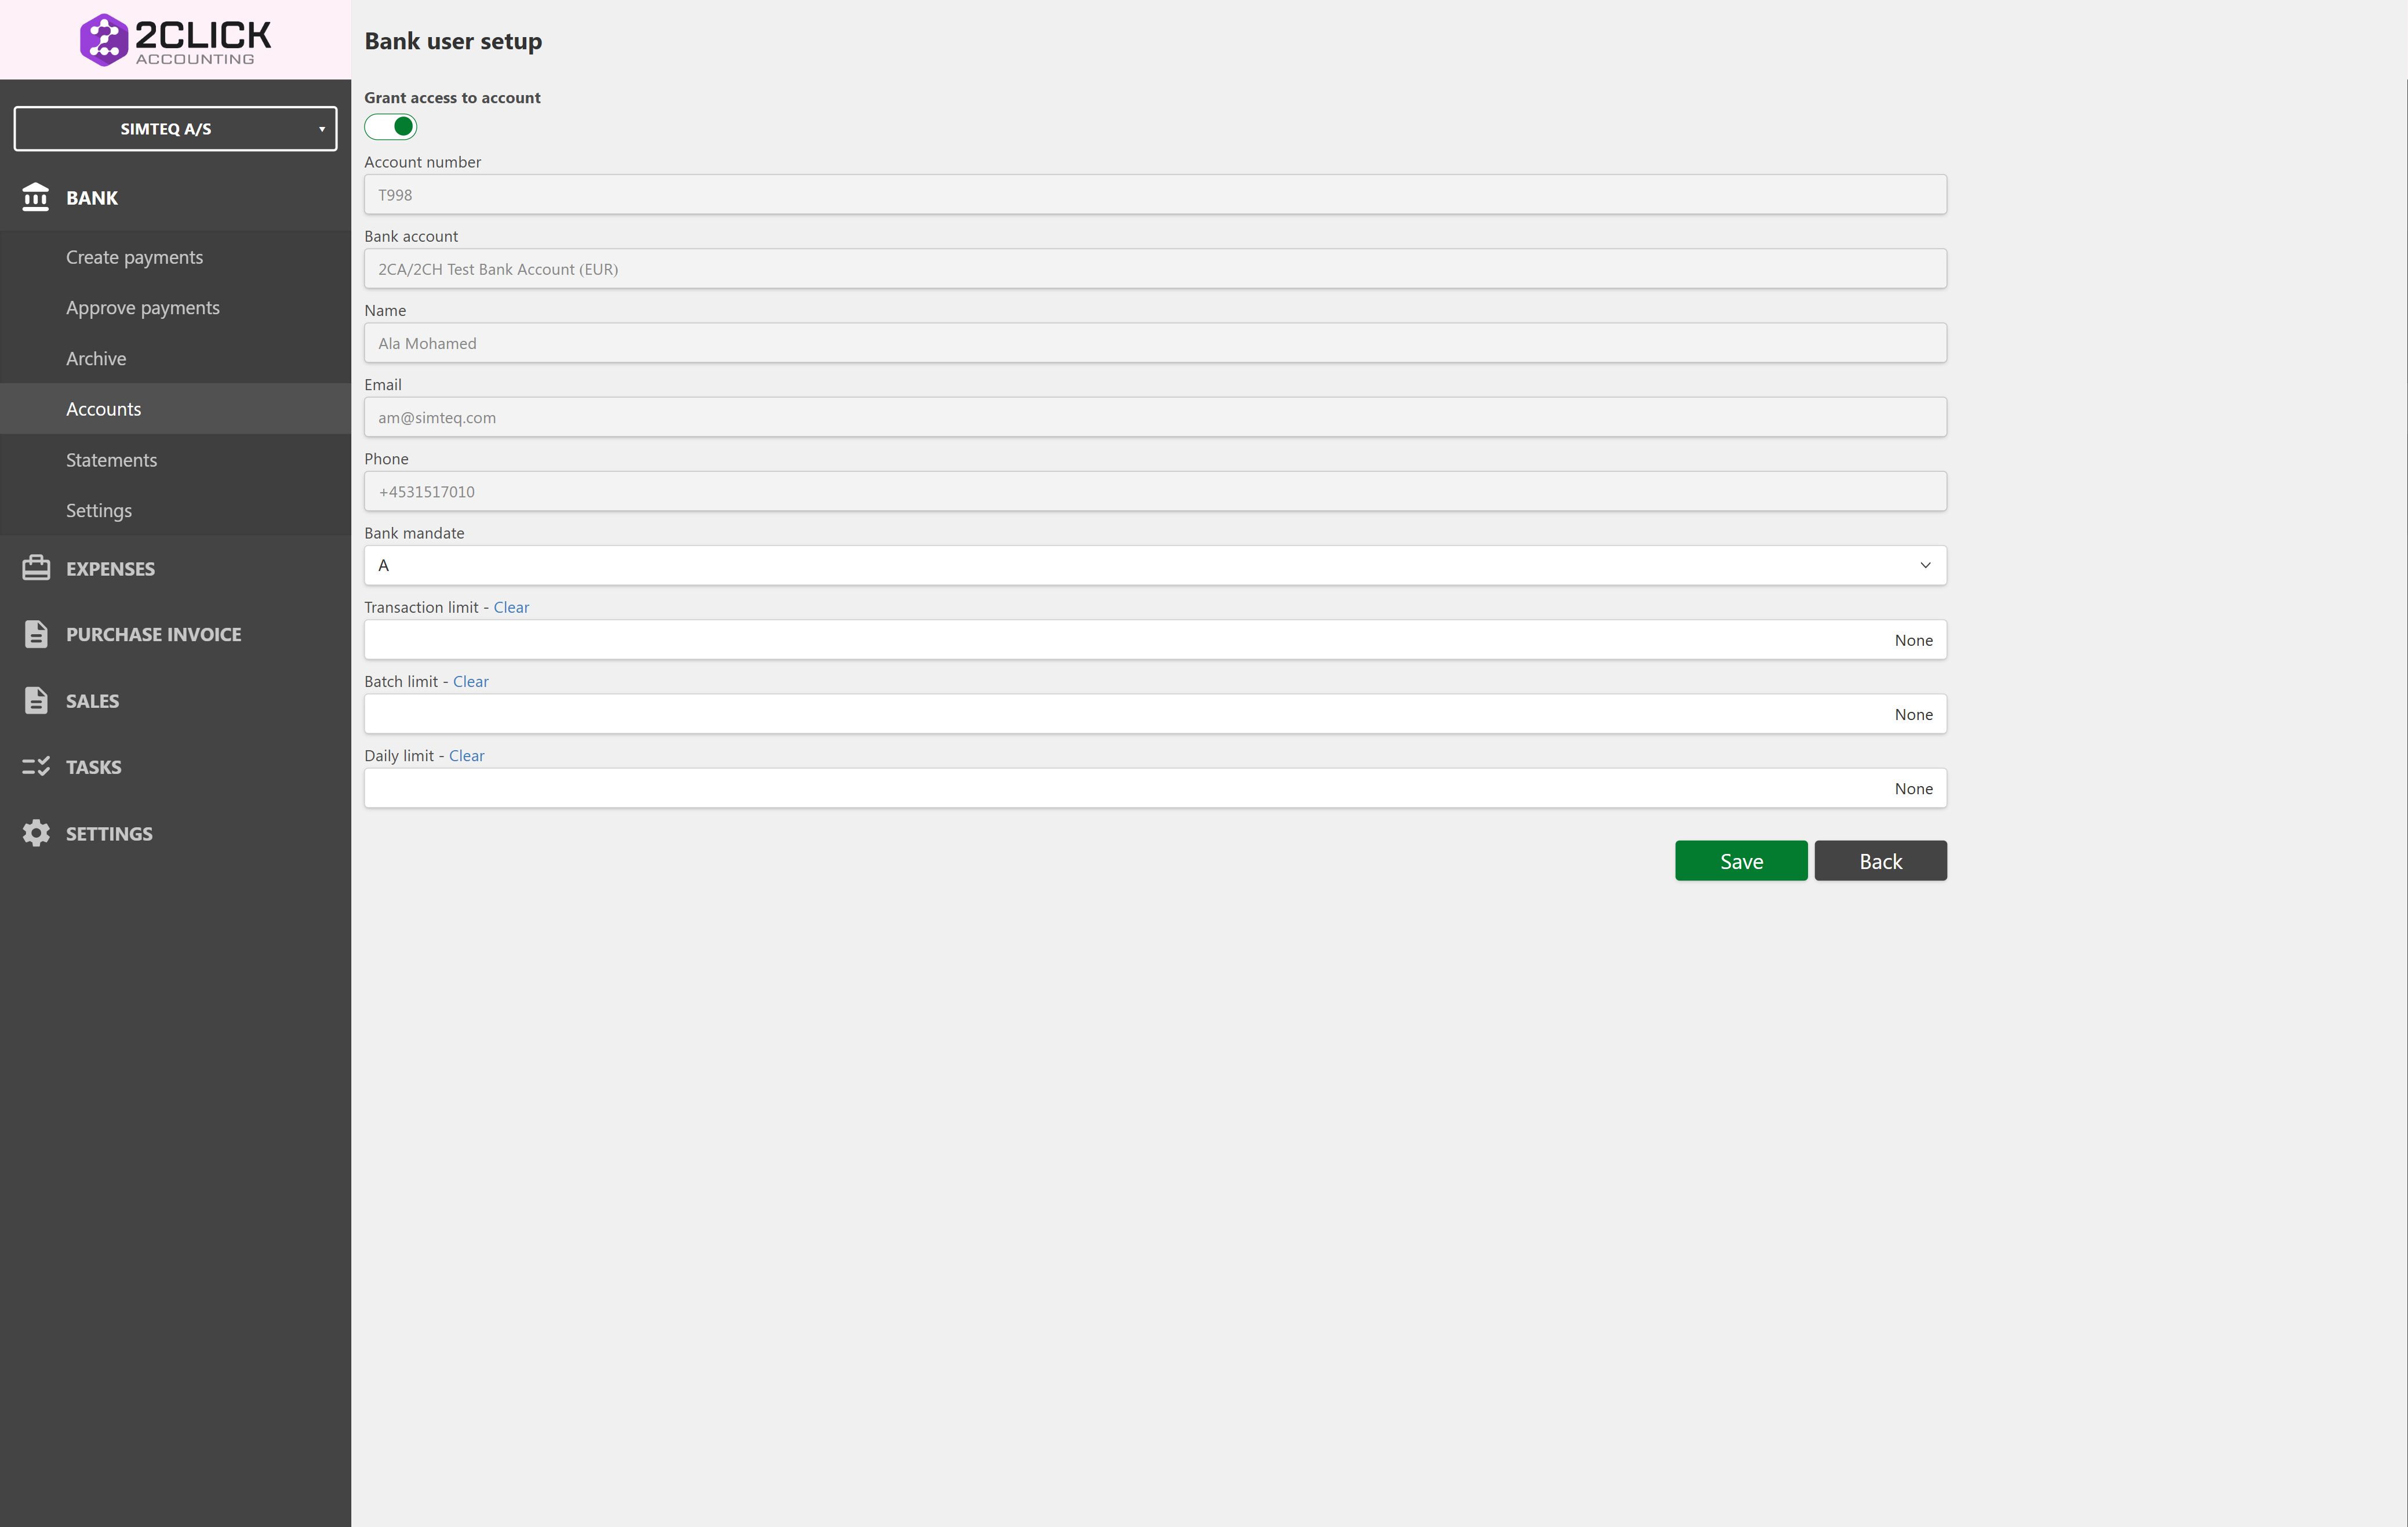
- In addition, the user that is to create and approve payments for a designated account, needs a bank mandate that allows them to do so. Bank mandates are assigned by an admin for each user and each account in the "Bank user setup" for the desired user. Furthermore, the user will need to have the "Grant access to account" activated. A functional bank user setup for an account looks like this:

How to create a payment in Consolidated view
Note: When using Consolidated View, please allow extra time for data to load. The system retrieves payments and other data in real time from each entity's ERP system, so loading times will be longer when multiple entities are included. If you have a large number of entities and loading takes a long time, you may want to consider continuing to work in single-entity view for the time being.
The creation of a payment in consolidated view is just like creating a payment for a single company in 2Click. The difference is that "payment batches" can now be created for several companies at the same time, by using different house banks. That means that the prerequisite for creating a payment is to have:
-
A house bank account assigned for the currency of the desired payment item in the company's account settings.
-
A bank mandate giving you access to perform actions for the selected house bank account.
-
(The rest of the bank account setup of course also need to be intact)
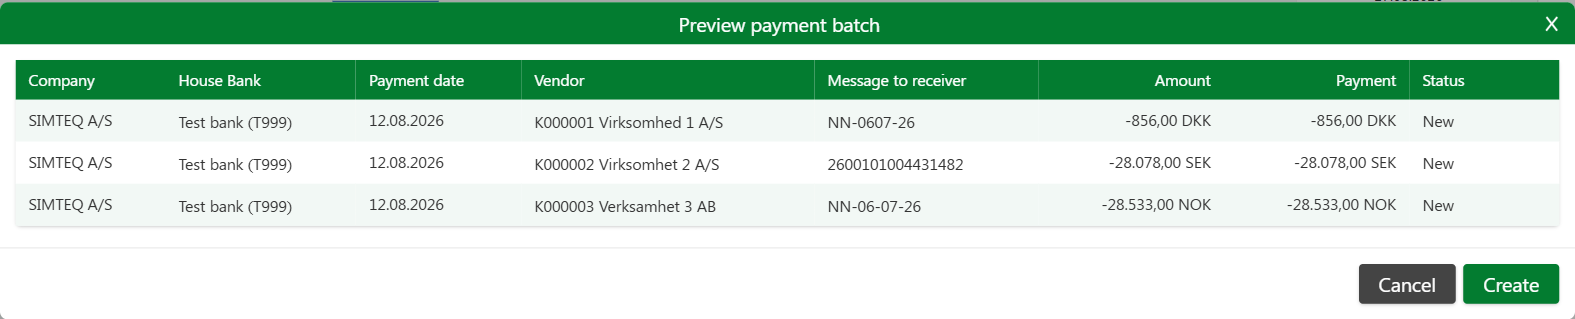
When a payment batch is created and you want to post it, a preview pop-up will appear for you to confirm the created batch. The confirmation process works the same as when working within a single-company environment: once confirmed, the payments will be sent for approval.
Note that if one or more of the selected payments cannot be completed for some reason, they will stay under "Create Payments" in the "Failed" tab. If a batch contains both payments that succeed and payments that fail, the successful ones will still be posted and sent for approval, while the failed ones stay behind so you can review and fix them.

Managing Multiple Bank Accounts and Failed Payments
When creating payments, a company may have several bank accounts. The system therefore supports automatic splitting of payments into separate payment batches per bank account.
How It Works
When you create a larger payment batch, the system automatically reviews all payments and groups them according to the bank account they are to be paid from.
Example:
-
Bank Account A → Batch 1
-
Bank Account B → Batch 2
-
Bank Account C → Batch 3
The system then attempts to process all the underlying batches.
Handling Errors
If one or more payments cannot be processed, the system does not stop the entire payment run.
Instead, the following happens:
-
Valid payments are processed and passed on to Approve.
-
Failed payments are moved to the Failed filter.
Once processing is complete, an error message is displayed showing which payments could not be created and why.
Viewing Failed Payments
Once the payment run has completed, you are automatically taken to the page showing failed payments.
Under the Failed filter, you can:
-
See all payments that were not processed.
-
Click Expand next to the individual payment.
-
See the specific error message explaining the cause of the error.
This allows you to correct the error and retry the payment without having to recreate the other payments.
The system ensures that payments on different bank accounts are handled in separate batches, and that errors in individual payments do not prevent the remaining payments from being processed.

Approving payments in Consolidated view
For the approval process, things are fairly simple when working in consolidated view. As for creating payments, there are slight differences and things to note when working across several entities in a single view instead of a single company.
Company filter
In the standard "Create Payments"-list the following filters are applicable:
-
Vendors
-
Amount
-
Payments (number of)
-
Status change
When using Consolidated view, there will be an additional filter at the start of the table that states which of the companies in the consolidated view the selected payment belongs to, called "Company":
As you see marked in bold in the left filter column in the table, the different entities within the subscription is stated for each of their respective payments. This allows the user to keep track of which company actions are made for, even though they are using the consolidated view.
Bank mandates
In order to approve payments for a designated account, the user needs a bank mandate that allows them to do so. Bank mandates are assigned by an admin for each user and each account in the "Bank user setup" for the desired user. In addition the user will need to have the "Grant access to account" activated. A functional bank user setup for an account looks like this:

How to approve a payment in Consolidated view
Once the setup is in place, the approval process is the same when approving in consolidated view, or in single-company view. There can only be completed approval of one payment batch at a time, which of course then only applies to one company at the time.
Select the payment you want to approve in the list, press the green button, write your PIN, and confirm trough OTP - and your payment batch will be approved and sent to your bank.
Archive
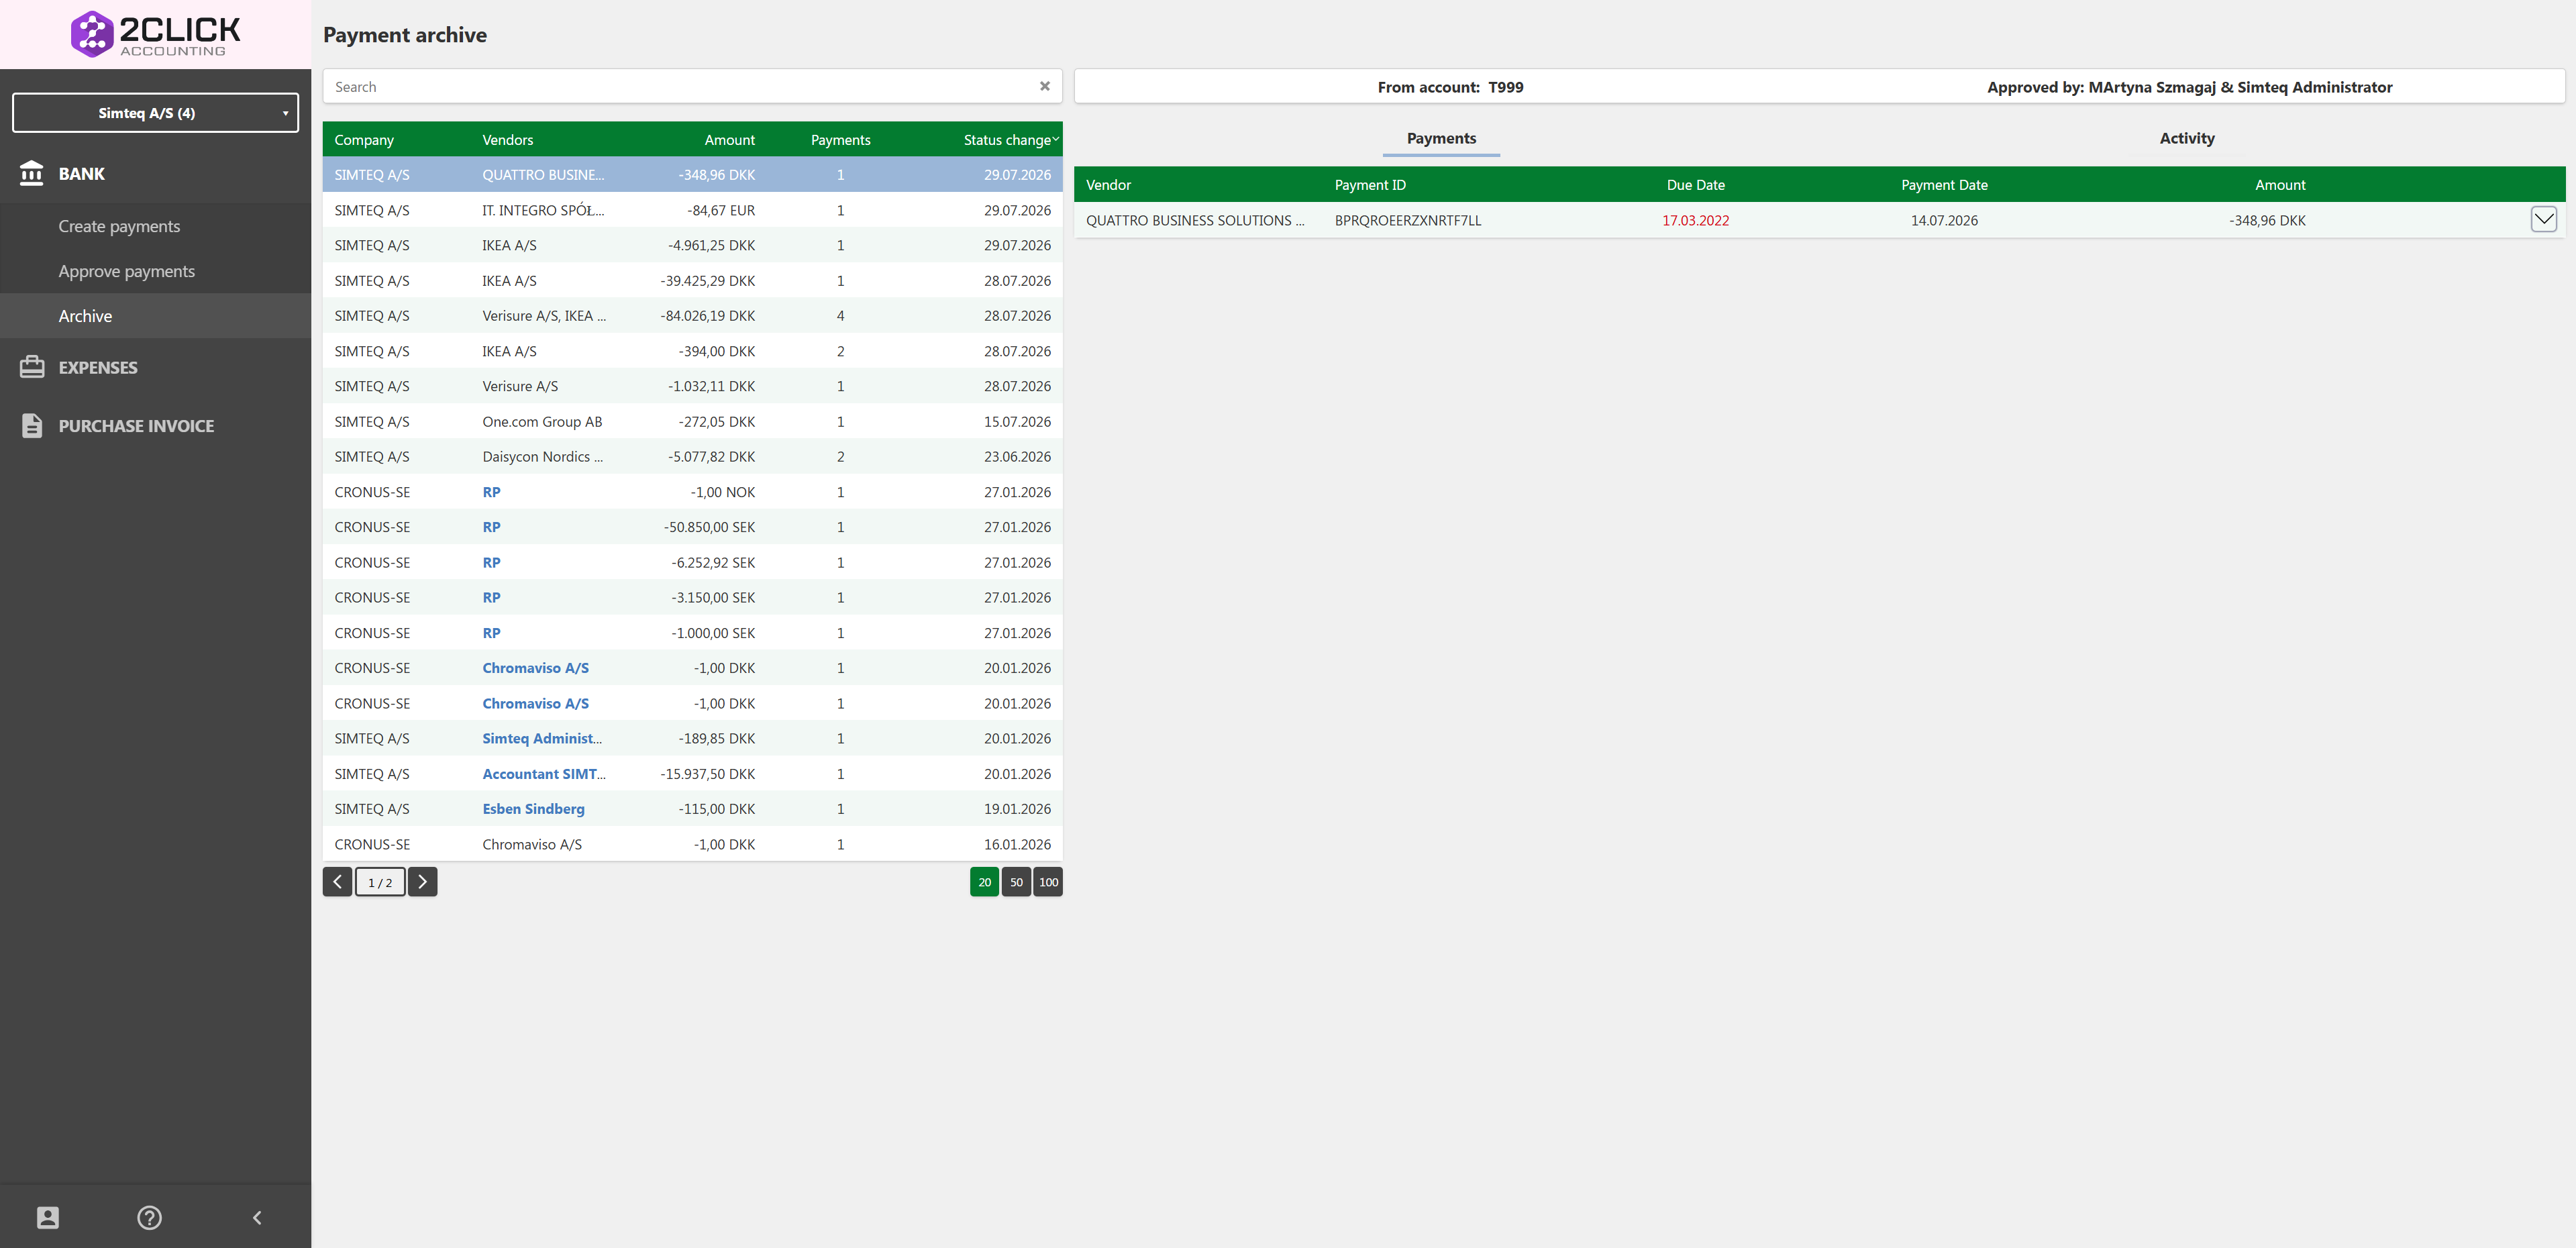
The Bank Archive shows all posted and completed payments. The only difference when using the archive in Consolidated View is that you can see the payment archive for all your companies at the same time.
Each payment is marked with the company it was completed within, shown in the left-side column. To get a more detailed understanding of the standard page (without consolidated view), go to ARCHIVE